(Last updated on: May 22, 2019)
Sometimes you need to add text to a seating plan to indicate where something is, such as a balcony or section.
Here’s a couple of examples. We’ll add a section label, then add a stage.
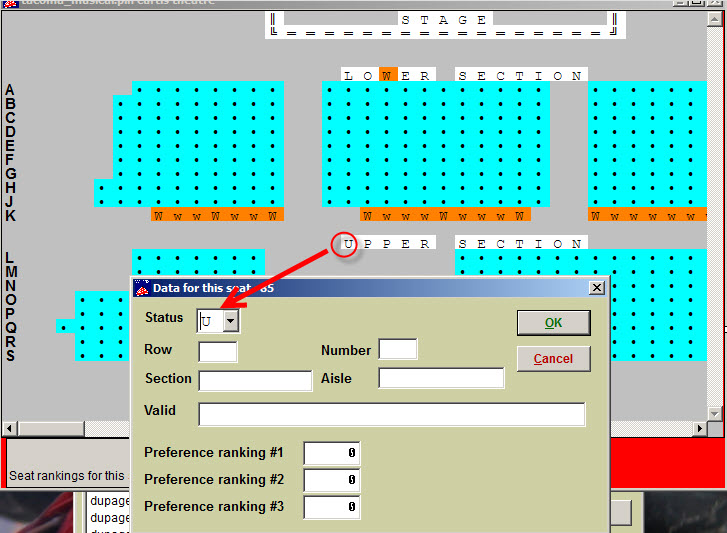
To indicate an upper section, go to Tools | Seating plans, and choose the correct seating plan. Add the words “Upper Section” by placing your cursor where you wish the words to appear and, within the Status field, input the letters one at a time. See example below: When you place the “U” in the Status field, the U will appear on your seating plan.
 Now let’s add a stage to a seating plan.
- Go to Tools | Seating plans.
- Double click on the plan.
- Decide where you want the word STAGE to appear.
- Now, double click on the first cell and type a capital S
- Do this for each cell, typing each letter into the cell’s Status field until it spells out STAGE.
- To create a border around STAGE, click the down arrow in the Status field and choose lines and corners.
- You may need to click the Update all charts based on this plan button once you close the plan to see the changes you made on existing seating charts that have already been added to shows.
NOTE: If you haven’t sold any seats with the plan and need to add rows for text or a stage, click here for instructions on how to add rows to a plan.

