(Last updated on: June 19, 2023)
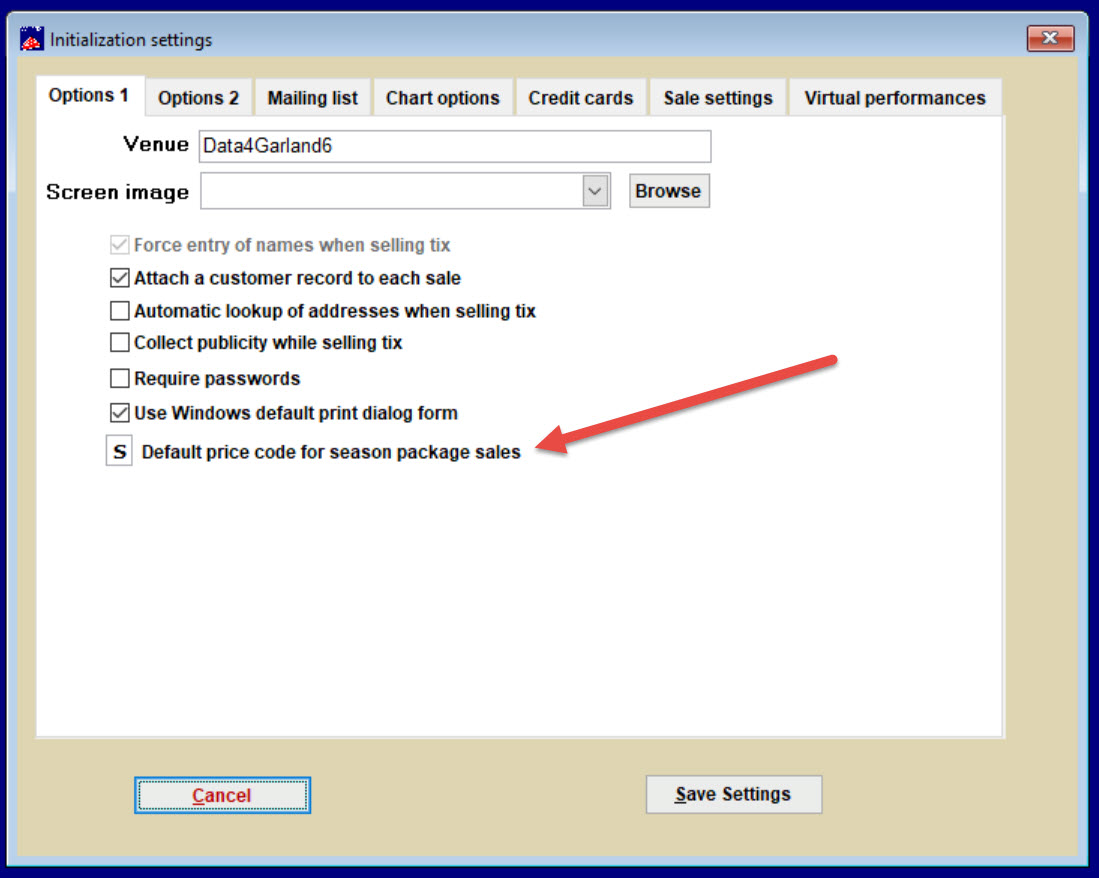
Go to File | Initialization. The Initialization settings window appears:
The Initialization window is where you will setup Wintix to best suit the specific needs of your organization.
Select from the choices offered in the Options 1 tab.
- Venue
- The Venue field is where you enter the name of the presenting organization or facility. This information will appear on the tickets just as it is typed here.
- Screen image
- Personalize your Wintix screen with your company logo, cute kittens or whatever you want.
- Force entry of names when selling tix
- When selected, Wintix will not let you finish a ticket sale without entering at least a customer’s last name.
- Attach a customer record to each sale
- Allows you to keep sales records by customer.
- Automatic lookup of addresses when selling tix
- Wintix will automatically look up addresses of customers during a sale so no need to manually enter them.
- Collect publicity while selling tix
- When selected, Wintix will ask “How did they hear about it?” with each ticket sale. Answers are stored with each sale record for use in the Publicity report.
- Require passwords
- When selected, all users will have to login to Wintix with a username and valid password. You can then set user “rights” or “privileges” according to the individual needs of your staff. Click on Tools |Password | Edit the list of users to get there. Login as Sysadm.
Warning: Do not turn passwords on until you give yourself permission to turn it off. Go into the password section to do this.
- Use Windows default print dialog form
- The best option for most operations
- Prompt for backup when exiting Wintix
- A helpful inquiry. Backing up is essential to your system and business.
- Default price code for season package sales
- Many theatres use “S” but you can choose whatever you like.

