(Last updated on: May 14, 2021)
Click here to learn how to set up a Fan Club.
Set up your show as you normally would for your organization. This will work for both Reserved and General Admission shows.
Add Fan Club pricing to your event
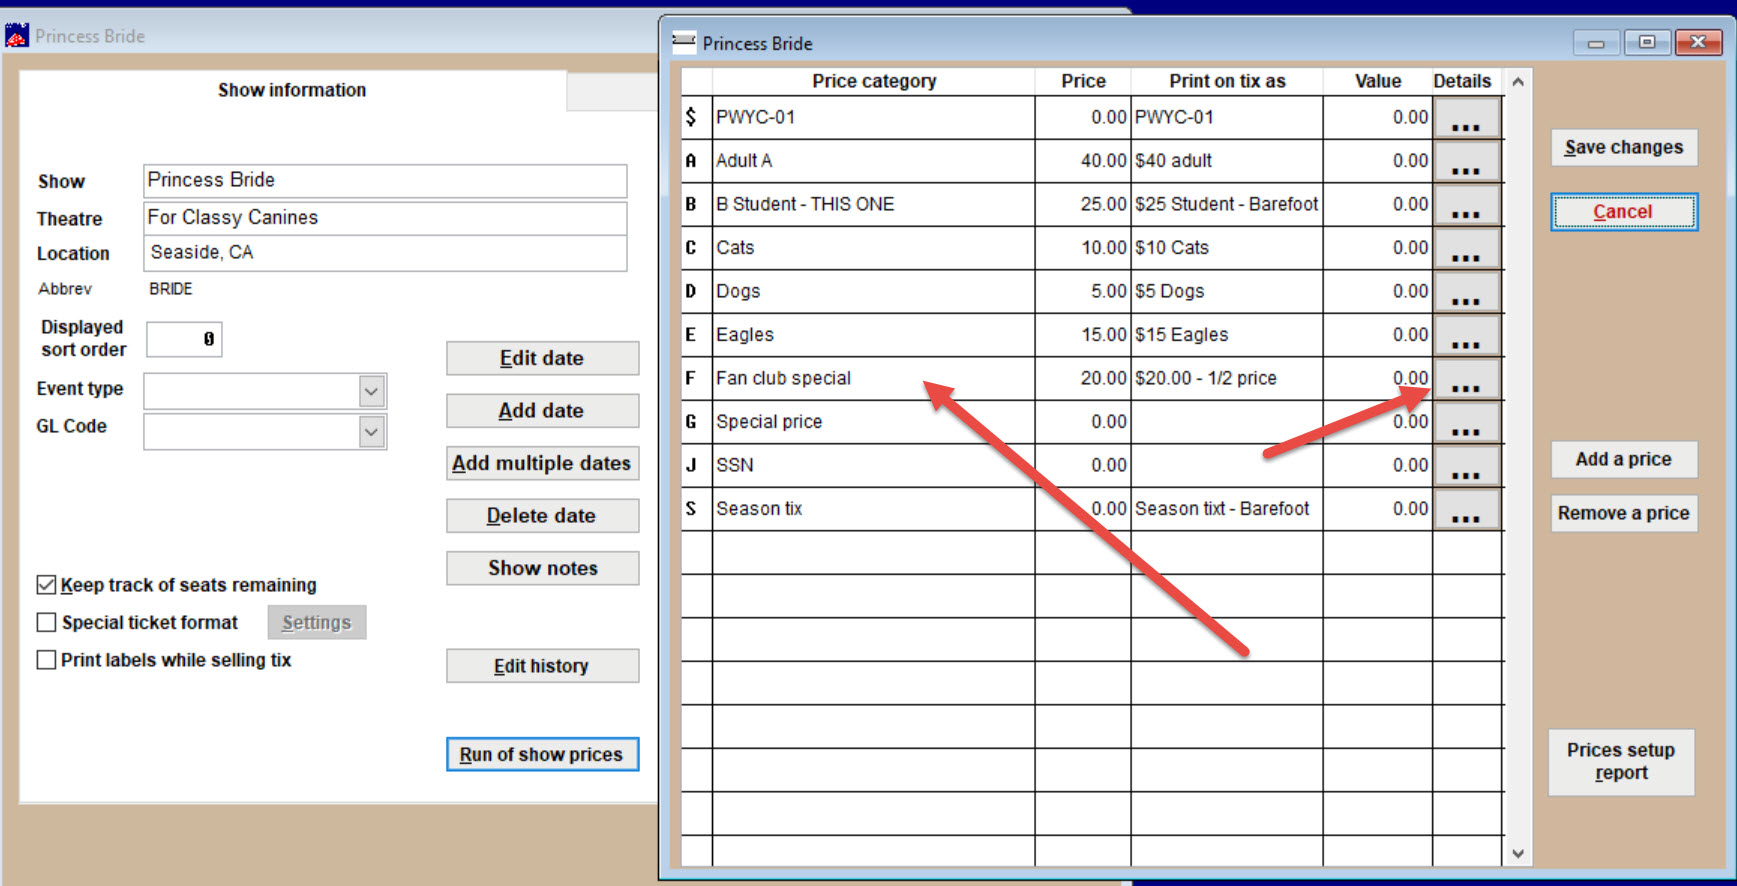
- Select the show to go on sale to the Fan Club and add the Fan Club price(s).
- To do this, go to Edit a show.
- Click on the Run of show prices button.
- Click the Add a price button.
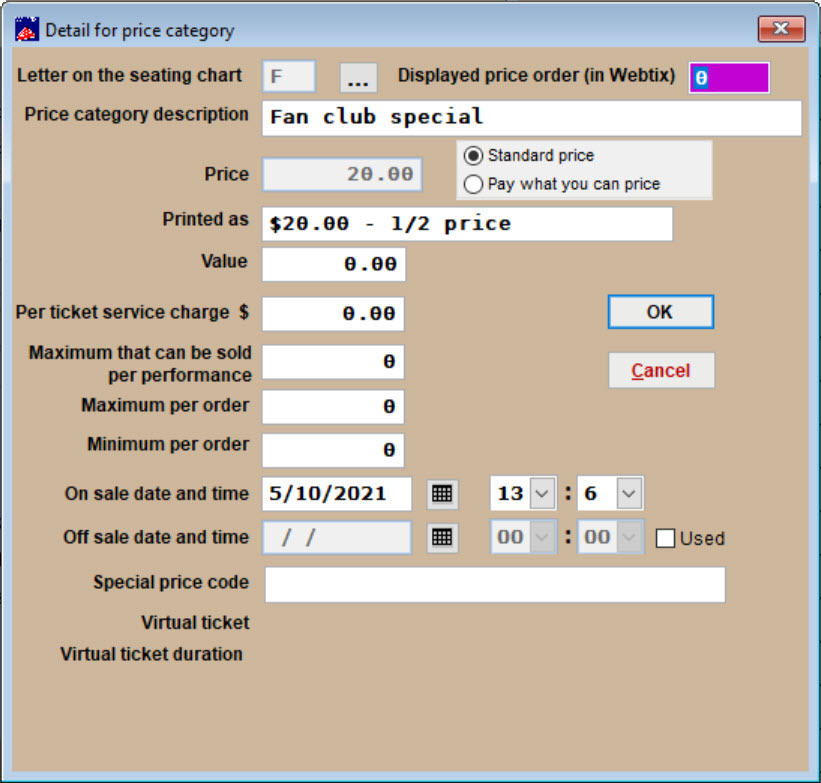
- The Detail for price category window will appear.
- You will choose the letter on the seating chart and several options that include how many can be sold per performance, per order, as well as on and off sale dates.
Next, we will make sure this price is available in Webtix for online sales.
- Go to Edit a show | Internet Options tab.
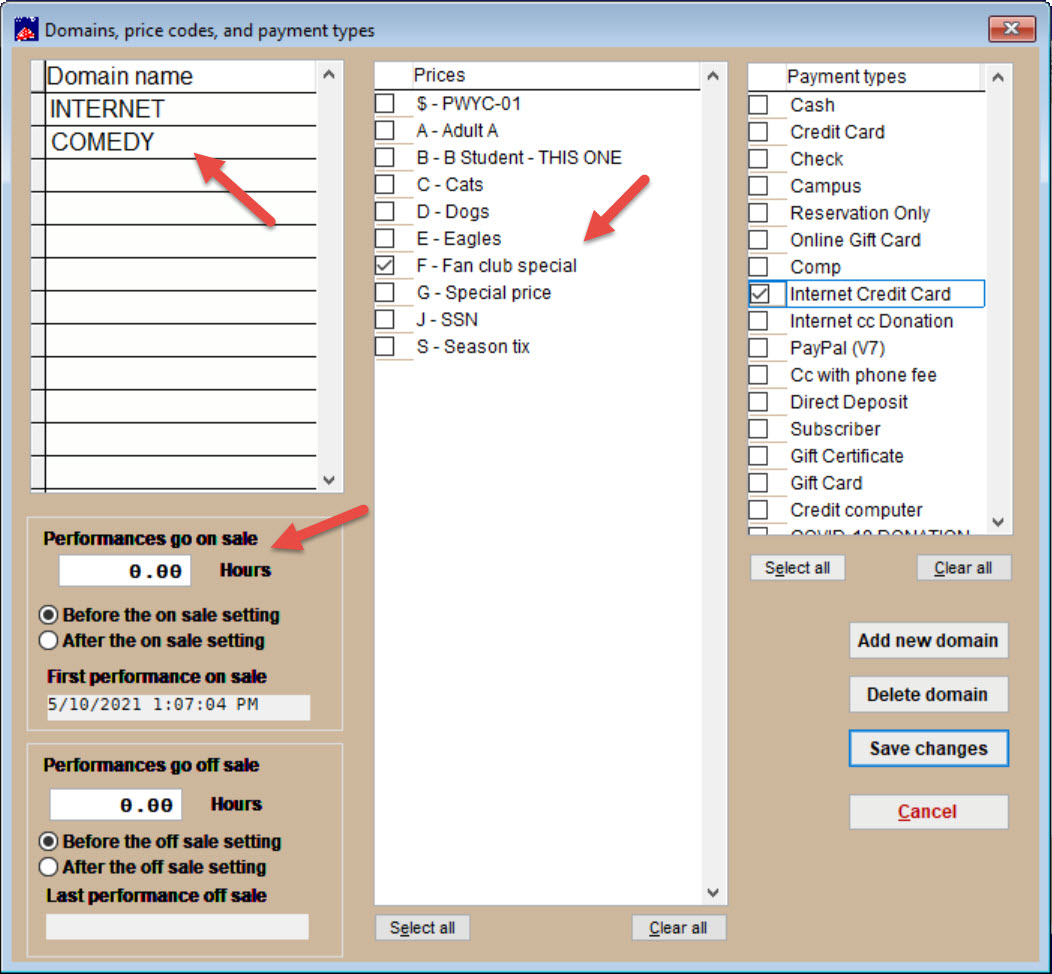
- Click on Domains.
- Click the Add a new domain button.
- Add the name of the Fan Club domain.
- Check the box for the Fan Club price.
- Set the performances in that domain to go on sale on the date you want it to go on sale to your Fan Club.
- Set the Performances to go on sale at 0.00 hours and check the Before the on sales setting radio button.
Now, the tickets are on sale to the Fan Club – and the Fan Club only
- As the fans purchase tickets, they will be removed from the Fan Club list to prevent multiple sales.
- After the Fan Club tickets go on sale, the general public will be able to purchase what is left when you decide to let them.
- When you notify the Fan Club that tickets are on sale, remind them that they will need their email address and password in order to log in.
- Before you go live with the Fan Club, do a few tests and make sure it works.


