
(Last updated on: June 25, 2020)
Do you have a show that requires a unique logo or image (a special ticket format) or do you need to add a logo/image to your default ticket format?
PLEASE NOTE:
- Your image must be around 1″ in diameter and 72 dpi to fit. You may need to make adjustments to the size as you fit it.
You begin the process a bit differently depending on whether you want it on a default or special ticket format.
To attach a logo or image to your default ticket format (lasertix.lbx)
- First, save the logo/image file into the Wintix6 directory (C:\Wintix6)
- Go to File | Ticket setup | Windows printer setup
To attach a logo or image to a Special Ticket Format (STF)
- Go to Show | Edit a show
- Click on the Settings button (next to the Special ticket format checkbox on the lower left side of the Editing a show window)
- Then click Windows printer setup
NOTE: The following instructions apply to adding an image to both the special ticket format and default format (lasertix.lbx).
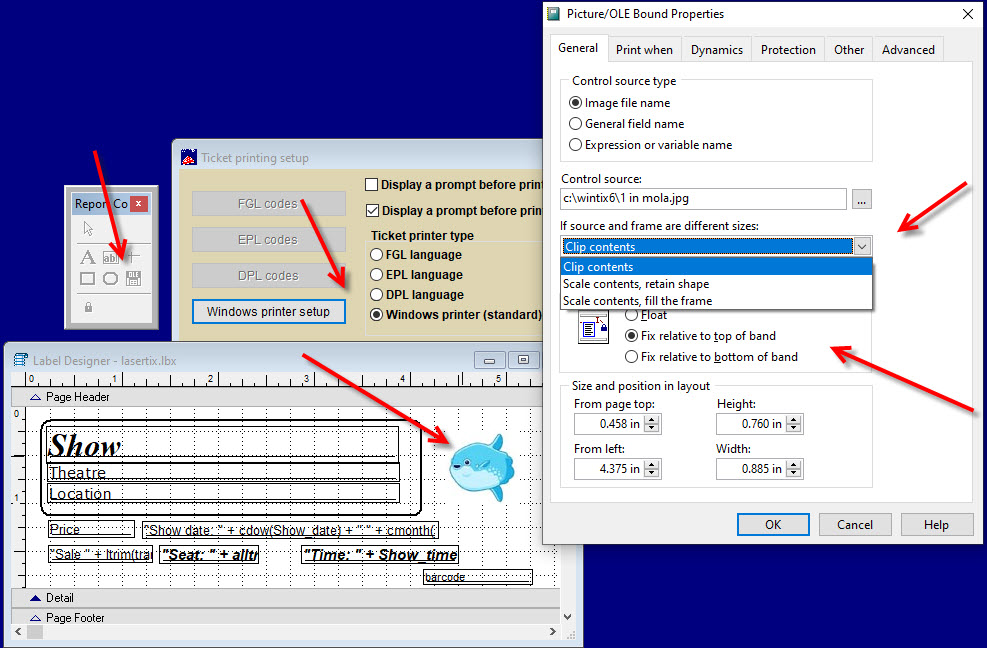
- The Report controls window will appear.
- Click on the OLE icon.
- Click and drag on the spot on the ticket where you want your image.
- The Picture/OLE Bound Properties window will appear.
- Click on the … (ellipsis) button beside the Control Source field.
- That will open a Windows dialogue box. The dialogue box should automatically open to C:\Wintix6.
- Click on the logo/image file you saved into that directory.
- Then click OK.
- Click File | Save and you’re done.