(Last updated on: December 30, 2024)
Creating a detailed, accurate seating plan is a vital step to selling tickets with a reserved seating plan. While not difficult, it can be pain-staking, tedious work filled with many nuances that must be precisely performed.
Center Stage Software will input your first seating plan and we highly recommend that you have us create any additional ones you need for a nominal fee.
If you need to do minor modifications, copy your seating plan, rename it and do the modifications on the copy.
If you have a service contract in place, we will be glad to help you with small modifications to your seating plans that are already in Wintix at no extra charge.
To create a seating plan:
First, you need to know the width and length of your new plan.
The width of your plan is derived by adding:
– the number of seats in the widest row of each section, plus at least one space (we recommend two) for each aisle between sections of seats.
The length of your plan will be:
– the total number of rows from all sections and areas, plus at least one line (we recommend two) for each cross aisle or change in areas (e.g., from Main Floor to Balcony). You may also want to add a few extra lines at the top or bottom of your plan for extra
descriptions.
If your seating plan is too long or wide, requiring you to scroll up and down or back and forth, you should consider breaking up your seating plan into multiple seating plans or charts.
- To create your new Wintix seating plan, go to Tools | Seating plans.
- When the Select the plan window appears, click the Create new plan button.
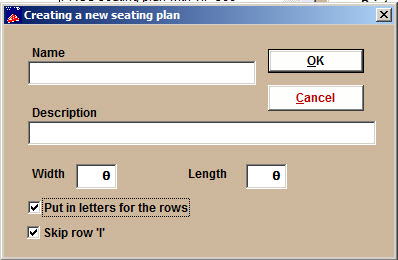
- The Creating a new seating plan window appears.
- Give the new plan a name (up to 8 characters) and a brief description in the fields as indicated.
- Enter the width and length of the plan.
- If you want Wintix to automatically enter row letters for you (beginning with A), leave the checkbox selected (see above). Many seating plans that use letters also don’t include a row I, so if that is the case, check that box, as well.
- If you use numbers or a different configuration for your row designations, leave the checkbox blank. You can make the row designations yourself later. When all the information is correct, click OK.
Let’s create a seating plan. For our tutorial, we will create a simple one. We recommend that you have us create more complicated seating plans.
- When you first open your seating plan, notice that the plan is a grid of cells.
- By default, the cells display character 249, which is a dot on an aqua background.
- Depending on the characters you put in the plan, the background color will change. This is very handy for giving everyone a visual alert if certain sections of the plan are for particular price codes only. Click here to learn more.
- The first step is to add your price codes.
- Group select the entire plan by right-clicking the top left cell, then right-clicking the bottom left cell to create asterisks.
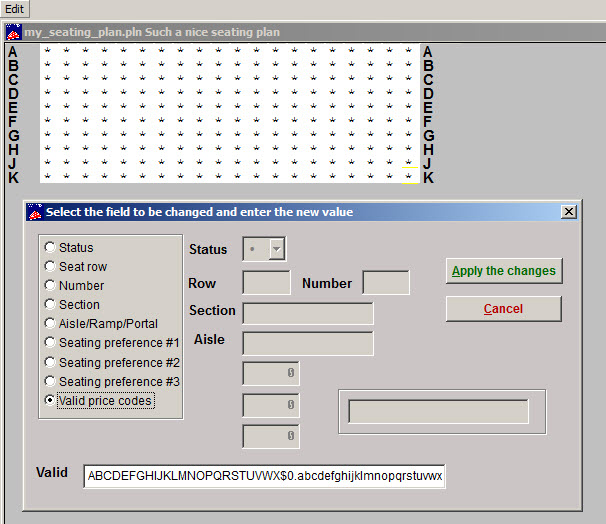
- A seating plan fields window opens.
- Choose the Valid price codes radio button. The Valid field will populate. Click the Apply the changes button.
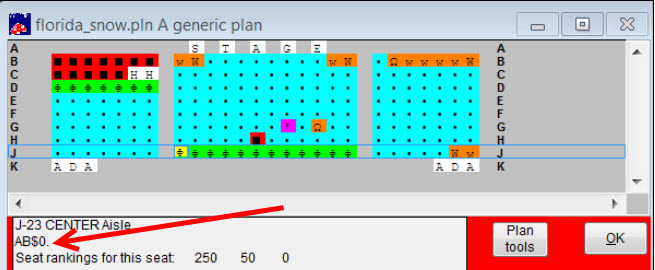
- The window closes and when you click on a cell in the seating plan, you can see that the valid price codes are now in that cell.
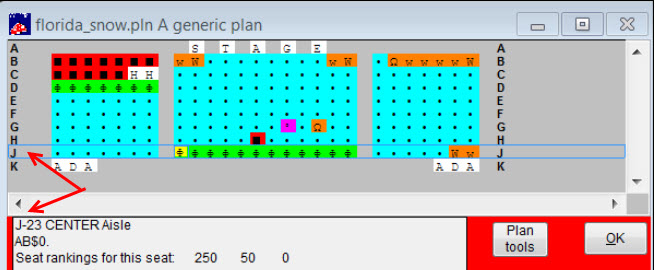
- We will now make sure all the rows are labeled correctly. As you can see from the screen shot above, the row indicators (A, B, C, etc.) appear on the left side, but there is no row indicator in the status box below.
- We chose to have the row letters display when we created the plan, so the row letters are now in the farthest left-hand cell:
- NOTE: If you left your row designations blank at the beginning of creating your plan, you need to click on the farthest left cell/seat in each row and type in the row letter/number.
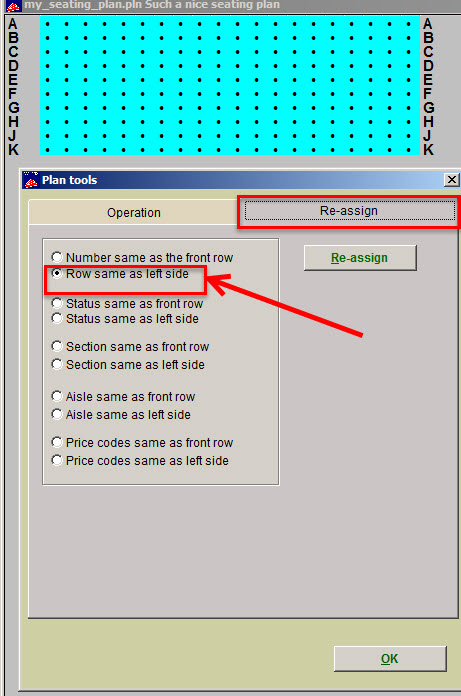
- To add Row A to all the cells in that row, click on the Plan tools button to the right of the bottom status window.
- The Plan tools window appears.
- Click the Re-assign tab.
- Choose the Row same as left side radio button, then click OK.
- NOTE: This bottom left window is where you can check to see all the data that is in the cell.
- Now, let’s put in an aisle. We recommend removing two columns or rows to create space between sections.
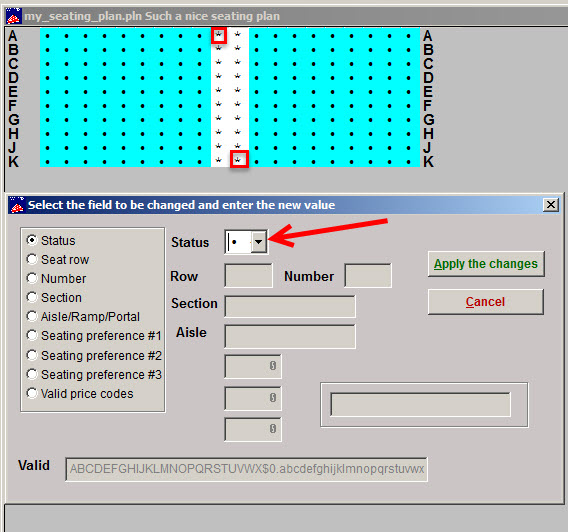
- Group select the cells by right-clicking the top left and bottom right cells. Asterisks and the Select the fields window will appear.
- Hold your left mouse button down and drag to the right to select all the characters in the status field, then delete them all. Click Apply the changes.
- Trim out your seating plan to remove all other seats that don’t belong in your seating plan.
- Now, lets number the seats. There are two ways to do this.
- ONE: If all the seats in each row have the SAME seat number all in a line…
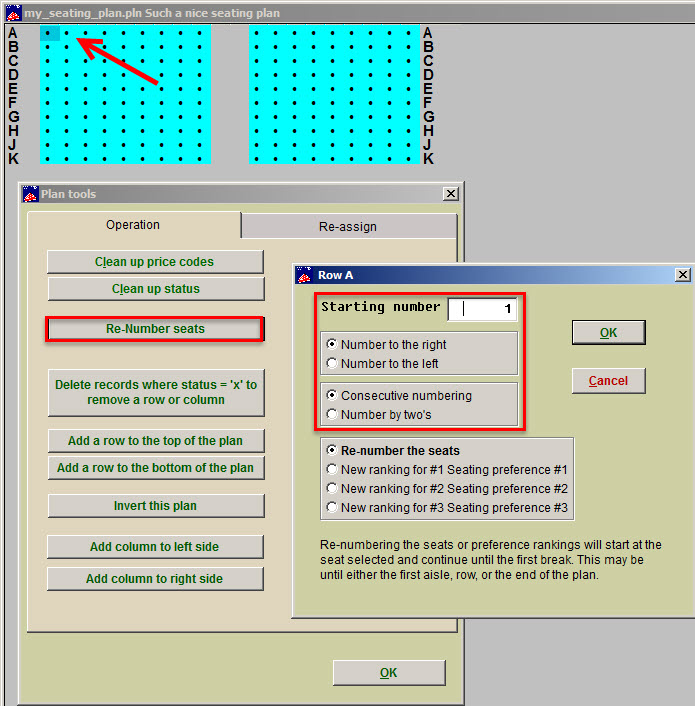
- Highlight the top seat where you want the numbering to begin.
- Click the Plan tools button.
- Click Re-Number seats.
- A new window will open. Choose from the variables to number your seats, then click OK.
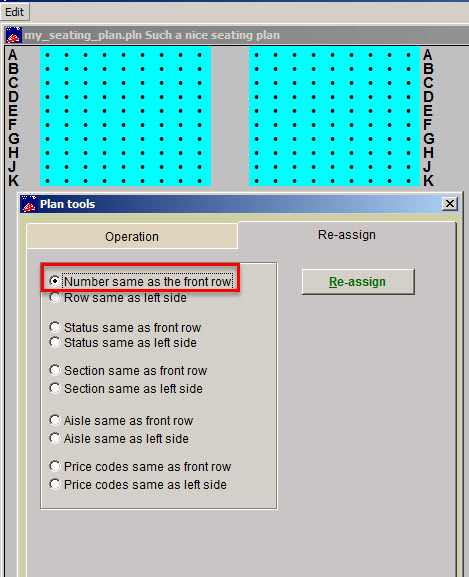
- Click on Plan tools again, then click on the Re-assign tab.
- Choose the Number same as front row radio button.
- NOTE: This feature will not work if there is a blank row at the top of the plan. Wintix will read that it is blank and not assign seat numbers.
- TWO: if the seat numbers don’t line up exactly from top to bottom, you will need to label each row individually by going to Plan tools | Re-Number seats.
NOTE: Click here to learn more about all the options found in Plan tools.
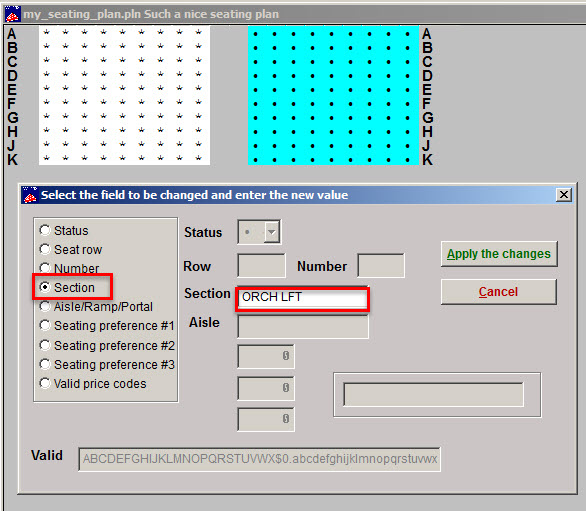
- If there are more things you need to label, such as sections, aisles, etc., group select the area and perform the operation. (In this example, we’ve highlighted the left seats, selected Section and labeled it ORCH LFT for Orchestra Left.)
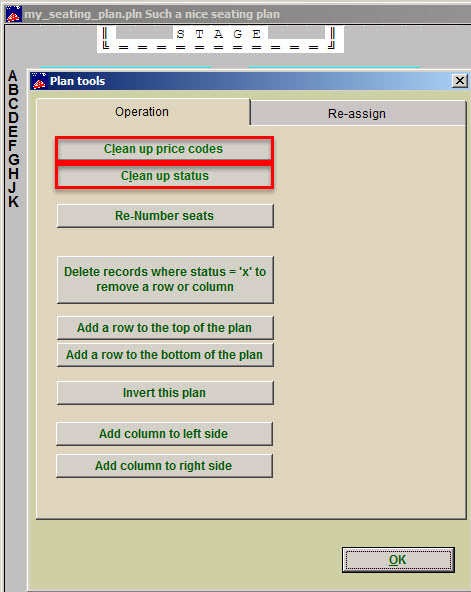
- Once you have all the seats, sections, rows, seat numbers you need, it is time to clean up the plan.
- Go to Plan tools and click Clean up price codes, then Clean up status.
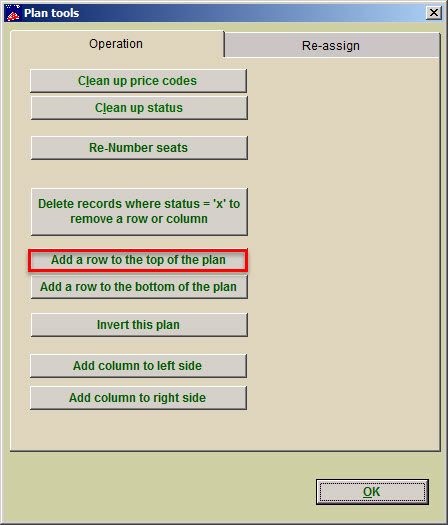
- Now lets add a stage to the top of the plan.
- Go to Plan tools | Add a row to the top of the plan and click OK.
- Your seating plan will close. Reopen it and repeat the operation twice.
- Now you have three extra rows at the top of your plan. Remove the “x”s by group selecting and deleting them.
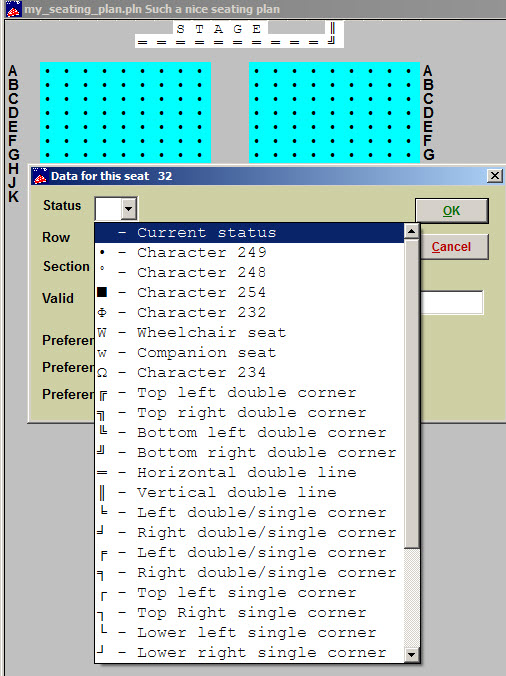
- Decide where you want it, and type each letter into the cell’s Status field until it spells out stage.
- To create a stage border, click the down arrow in the Status field and choose lines and corners.
- You can also label sections and aisles this way.
How to check to see if your seating plan is correctly built
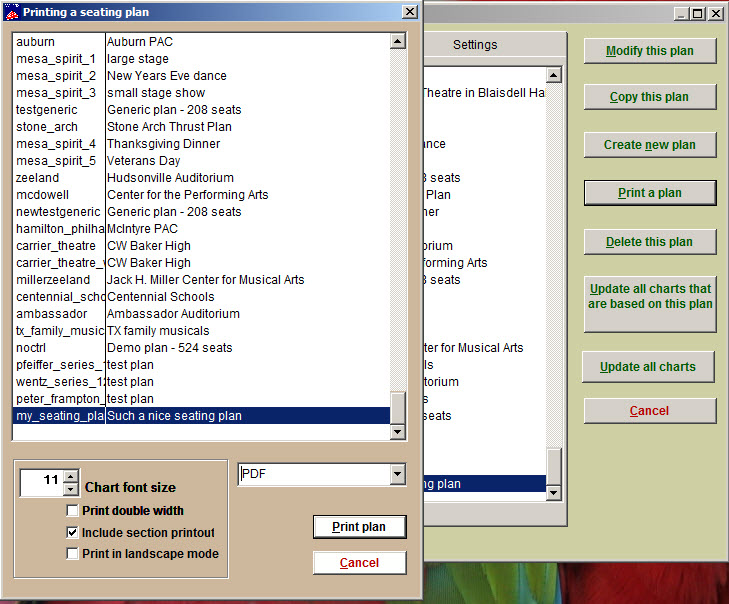
- In Tools | Seating plans, highlight the plan and click the Print a plan button.
- Check Include section printout and print the plan as a PDF.
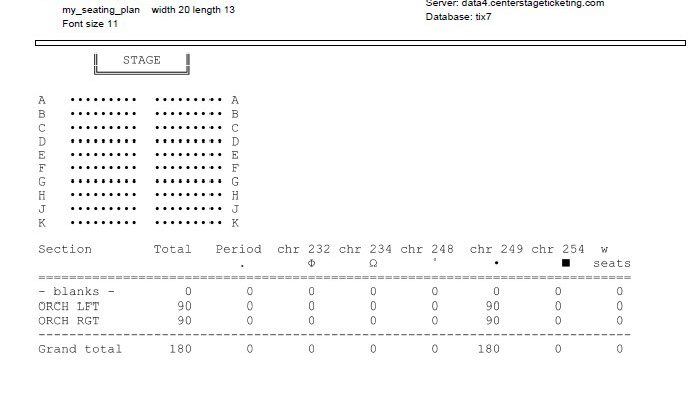
- Below is an example of the report you will receive. Notice that we have a total for each section, as well as a grand total.
- There are 0 (zero) blanks, which means that there are no empty cells with valid price codes in them. If the plan does have those, you will see a message telling you there is a difference between the number of seats and the number of valid price codes.
Tip:
Depending on how big your house is, you may want to display it bigger or smaller. Go to the File | Initialization | Chart options. You can select different font, column, and row sizes.

