
(Last updated on: January 8, 2024)
Note: It takes a couple hours to charge the battery, but you can charge it while you perform these tasks.
- Press the button on the right side and hold it down to turn it on.
- When a battery icon appears and then disappears, release the button.
- The screen will light up and Stripe will appear in the middle of the screen.
- The terminal will connect to your WIFI and then connect to the network. Any updates will be downloaded then.
- Finally, the screen changes to a rainbow pattern and the terminal is quiet.
- Place your finger on the left side of the screen and swipe right. The screen will turn black and a button with the word Settings will appear.
- Tap the Settings button.
- Enter a password of 07139. A menu will appear.
- Select Generate pairing code.
- There will be three random words separated by hyphens. This is the terminal linking password.
- In Wintix, go to File | Initialization menu | Credit cards | Configure Stripe terminals.
- Add your location (if not there already).
- Select the Terminals tab.
- Select Add terminal.
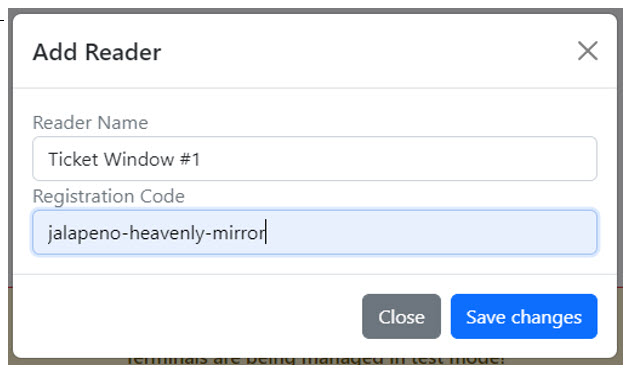
- For the reader name, enter anything that makes sense to you.
- For the Registration code, enter the three words from the terminal with the hyphens.
- For the location, enter something that makes sense to you.
- You are ready to do a test sale.