(Last updated on: November 4, 2024)
NOTE: The system administrator needs to give each clerk permissions to scan tickets by going to Tools | Passwords | Edit the list of users | Permissions | check Sales – Scan bar coded tickets and validate.
Go here to learn the advantages of using Scantix.
Go here to download the Scantix app from the Google Play Store.
Scantix on Zebra model scanners makes bar code scanning a snap. For purposes of our tutorial, we will be using the optional pistol grip. If you choose not to use the pistol grip, there is a scan button on the left side of the device.
Before we get into the details of bar code scanning, here is a short video from Zebra showing you how to attach the pistol grip.
- NOTE – the video above shows a discontinued model TC20, which has been replaced by a TC210.
- The home screen of the Zebra looks much like any smart mobile phone.
- Touch the Scantix icon to open the app.
![]()
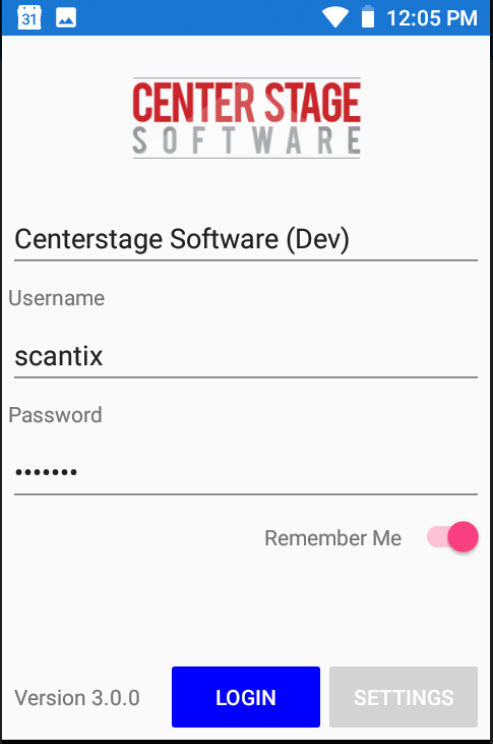
- The Center Stage Software screen appears.

- Next comes the log in screen.
- Note the version number on the bottom left. Scantix will automatically update your app when there are improvements and changes.
- Once you’ve logged in, the Today’s Events window appears.
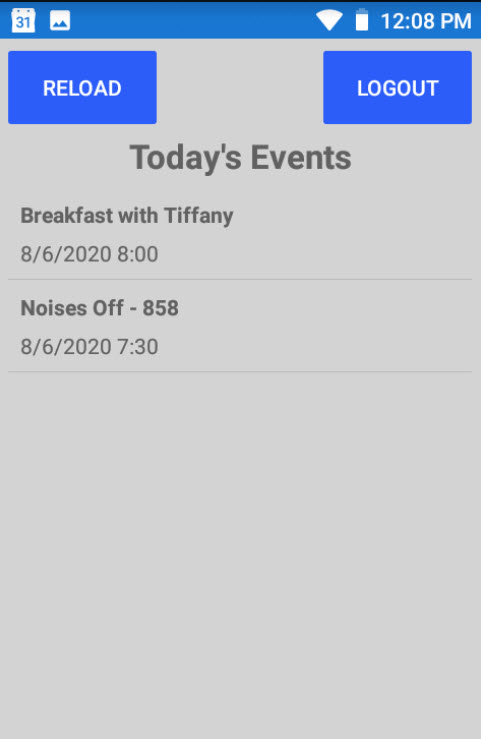
- Touch the event for the ticket you wish to scan.
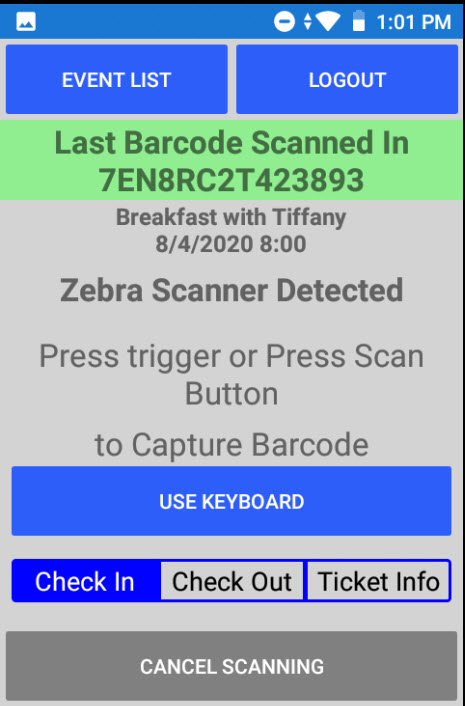
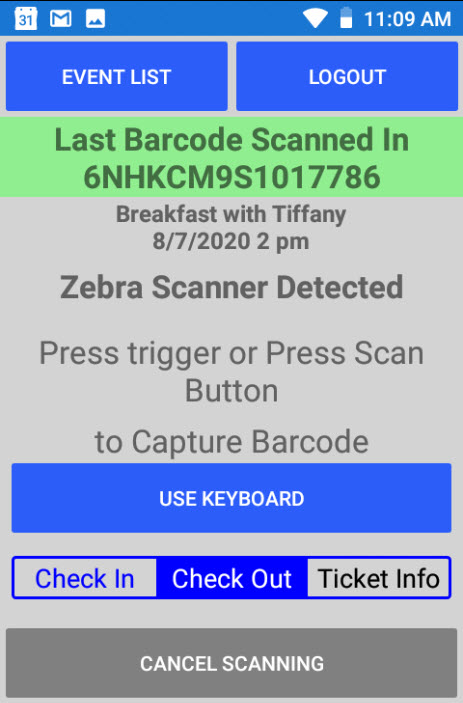
- Notice the options on this screen. You can check guests in or out, or look at the sales record data by touching Ticket Info.
Check someone in:

- Pull the trigger and hold until the red light has finished scanning the bar code.
- If you are not using the optional pistol grip, the Scan Button is on the left side of the device.
- If the bar code is unrecognizable and unable to be scanned, you can use the on-screen keyboard to enter the bar code manually, as long the bar code’s text is displayed on the ticket.
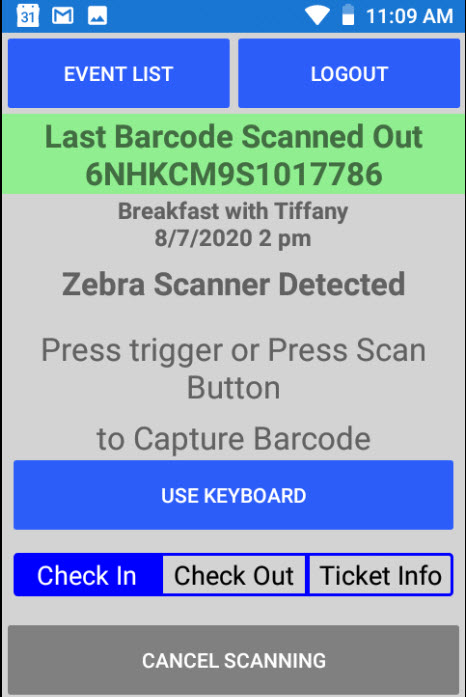
- Once the bar code has been scanned, you will see a screen similar to the one below.
- The bar code number is displayed and you are ready to scan more tickets.
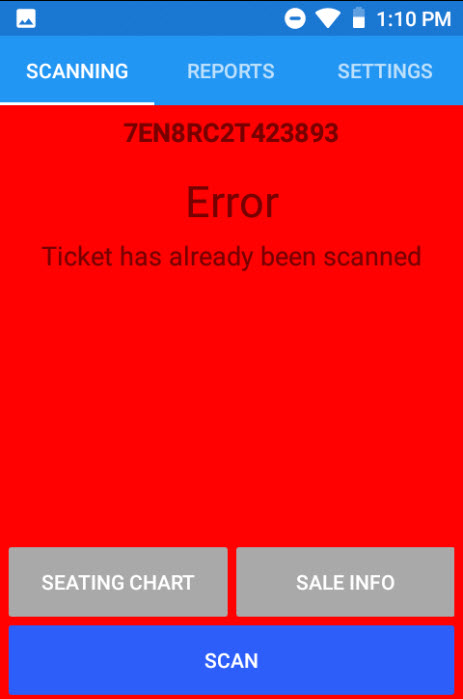
- If the ticket has already been scanned, you will receive an error message: “Ticket has been scanned.”
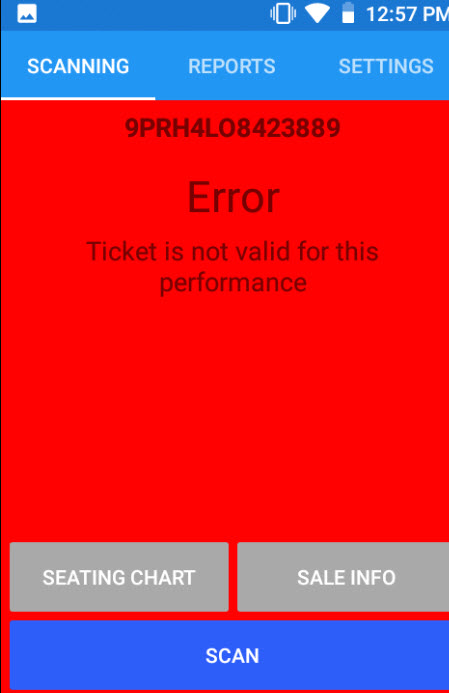
- If the ticket has not been scanned, but is for a different performance, you will receive an error message “Ticket is not valid for this performance.”
How to get information about tickets already scanned:
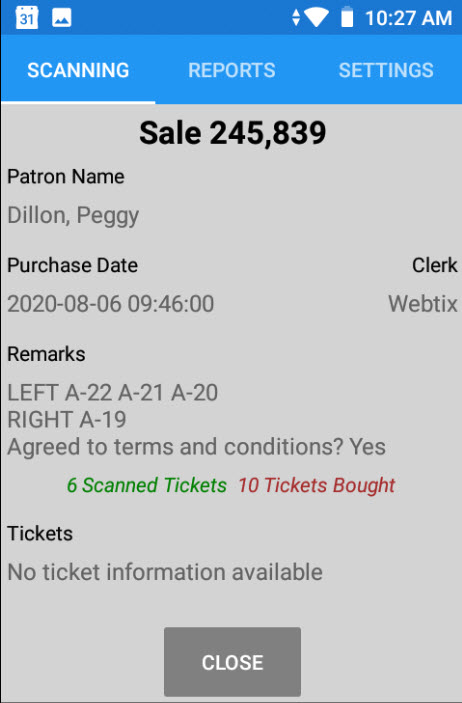
- If you need to retrieve information about the customer, purchase date, or seat assignments for a scanned ticket, go to the main scanning screen but this time, touch the Ticket Info button at the bottom of the screen.
- Rescan the scanned ticket. You will bring up the sales information for that ticket.
How to scan someone out:
- At the main screen, touch Check out in the middle bottom.
- Here is an example of what the screen looks like once they have been checked out.