
(Last updated on: December 10, 2018)
From the Godex LCD Screen:
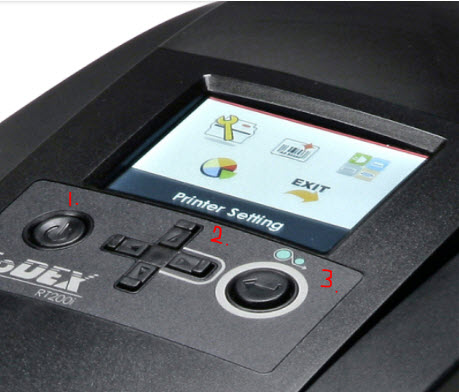
1. This is the Power on/off button.
2. These are four directional buttons that are used to navigate the menu.
3. This is the Enter key.
- Confirm that LCD screen says Ready.
- At the bottom of the LCD screen, confirm you see press →
(right arrow key) for three seconds to enter menu. Then press the key. - Once in the menu, the first window shows the option Printer Setting.
- Press the Enter key.
- Press the right arrow key → until Setting displays at the bottom.
- Press the Enter key.
- At the next menu, press the right arrow key → until you see Sensor.
- Press the Enter key.
- At the next menu, press the Enter key when you see Media Detection.
- At this menu, there are three choices: Auto Select | See-Through | Reflective. There will be a blue arrow pointing to the choice that is already selected.
- Most of the time, Auto select is selected. If this is the case, press the ▼ (down arrow) until Reflective is selected.
- Press the Enter key.
- To get back to the main menu, press the up ▲ (up arrow) until you are at the main menu.
- To save the settings, press the → (right arrow) until Exit is highlighted. Then press the Enter key.
You’re done!!