
(Last updated on: September 29, 2015)
- In Wintix go to File | Ticket Setup.
- Under Ticket printer type, click on the radio button FGL Codes.
- That will make the button labeled FGL codes active.
- Click on the FGL codes button, which brings up that window.
You can print up to 20 extra fields. That is what the extra fields section is for.
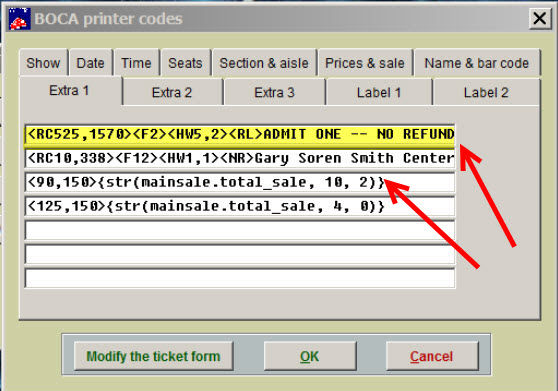
In this example, we added a no refund policy and a field, total_sale. Putting in the curly braces tells Wintix to print everything within them. If the fields are numbers, they need to be converted to text fields. That is what the str() function is for. For instance, to print the total_sale field:
- The field exists in the mainsale table so we call it explicitly with mainsale.
- The field is a numeric type variable so we convert it with the str() function.
- It has two decimal places so we tell Wintix that the total length is 10 but reserve two spaces for the pennies.
- We put curly braces around it and it is ready to go.
Our software’s default is to have 1) abbreviation of the title of show; 2) first and last name or last, first name of patron; 3) show date; 4) show time; 5) price; 6) row, seat number, section and aisle. (See screenshot below.)
Usually the lower tabs from Show through Prices & sale are part of the default set up in Wintix. You can input any additional verbiage using the Extra tabs. The Label 1 and Label 2 are for printing mailing labels using thermal tickets as the mailing label (such as you would use in windowed envelopes where you can insert the ticket showing the name and address label through the window).
