(Last updated on: October 31, 2014)
There are a few ways to do this, depending on what you need to accomplish. Are you mailing the tickets purchased online? Are your patrons going to pick them up at Will Call?
Below you will find instructions for printing individually selected tickets, printing a range of dates, and printing for a particular performance.
1. To print unprinted, individually selected tickets:
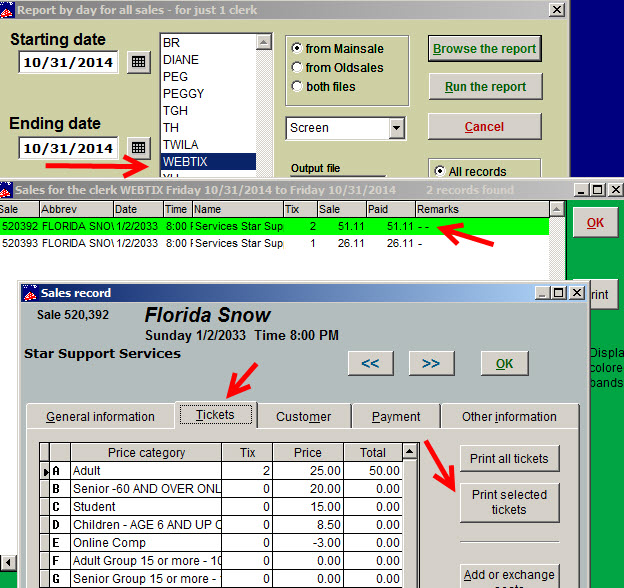
- To get a list of online sales, for a day, or a date range: Go to Reports|By day|Clerks|Report for one clerk – which would be Webtix
- The link below explains this step by step and is very helpful: https://help.centerstage.com/2014/02/reports-by-day-by-clerk/
- If you Browse that report, instead of running it to the screen, you can see all sales done and be able to access the sale record from that screen
2. To print unprinted tickets for a range of dates:
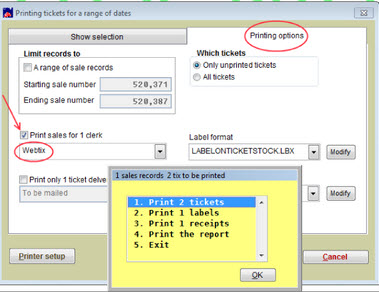
- Go to Tools|Ticket printing|Print tickets for a day
- When the Ticket printing window appears, choose your Starting and Ending dates
- Now click on the Printing Options tab
- Choose Only unprinted tickets
- Check the box Print sales for 1 clerk
- In the drop down list of clerks, choose Webtix. (Webtix will always be the clerk name for all online sales)
- Choose your label format
- Click Print the tickets
- A yellow window appears, with five options
- Print (#) tickets
- Print (#) labels
- Print (#) receipts
- Print report
- Exit
3. To print unprinted tickets for a single performance:
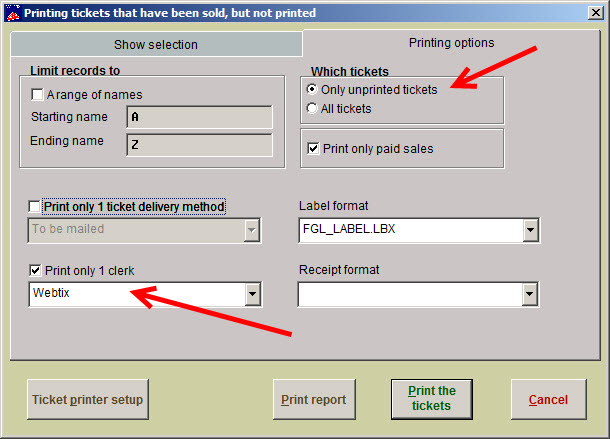
- Go to Tools | Ticket printing | Print unprinted tix for a performance
- Choose your show and performance date
- Click on the Printing options tab
- Choose Only unprinted tickets
- Click on Print only 1 clerk, then select Webtix from the drop down menu


