(Last updated on: April 4, 2018)
One of our clients reported this error with a Webtix order. When this happens, your online patron will also receive this error message. Generally, the patron will resubmit the credit card with the correct billing address.
If the online patron doesn’t resubmit, there may not be a record in Wintix to query the customer_ID number. In this case, you may log into Authorize.net. If the card was processed and declined, there should be a record in Authorize.net. You will be able to click on the transaction record and see who the patron was so you can follow up with a phone call.
If you’re taking an order either in house or over the phone and you get this message, then you need to ask for the correct billing address of the credit card. Where does this error come from? This is your payment gateway’s error. In this case, it is Authorize.net. AVS stands for Address Verification Service.
Whenever your box office receives these notifications, make a note of the customer-ID. When this error is received, there is no customer information attached. What can you do? Follow these instructions:
- Click on Mailing list | Customer lookup.
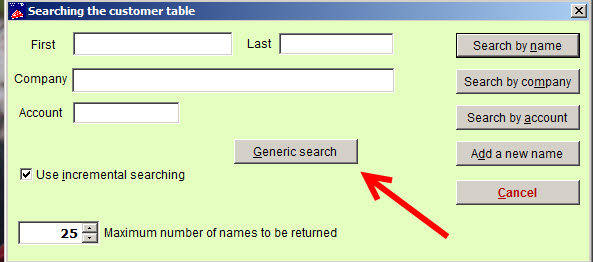
- Click on Generic Search – see screen shot below.
- Under the Field tab, click on the down arrow and find CUSTOMER_ID and click on this so it populates the field – see screen shot below.
- In the middle field click on the down arrow and click on Equals.
- Under the last field on the right, type in the number that was received in the Authorize.net error message.
- Once all three fields are populated correctly, click on the Search button.

- After clicking on search, a record will appear. Highlight what is displayed and click on the Use this information button.
- The next screen that appears will be the Searching the customer table window. See screen shot below.
- You will see the first and last name and account fields displayed and populated with data.

- Click on the Search by account button.
- The Customer information window will now appear.
- Almost there – Check to see if the Notes tab is displayed. If not, click on the Notes tab. You should see a History button. Click on it.
- The History of account window will appear and it looks like this:
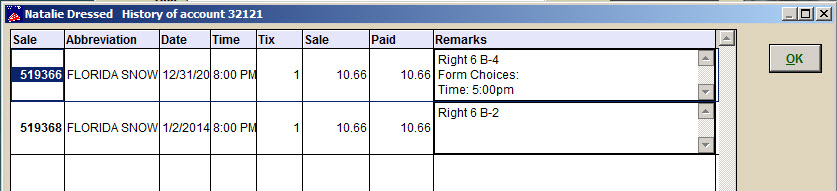
- Notice the number that is under the Sale column. That is the Wintix sale number. Double click on it.
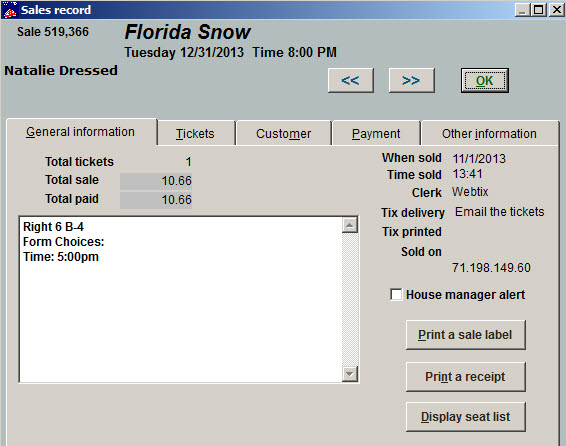
- Voila – the Wintix sales record appears showing exactly who purchased the ticket, when it was purchased, etc . See screen shot below: