(Last updated on: February 10, 2021)
Don’t reinvent the wheel! You can save and reuse ticket formats for any show. This is especially helpful if you have recurring special events or host special groups who regularly perform at your venue and you’ve set up a special ticket format for the occasion.
When you add a new show, (or for the next occasion of the show), copy the ticket format from the previous show.
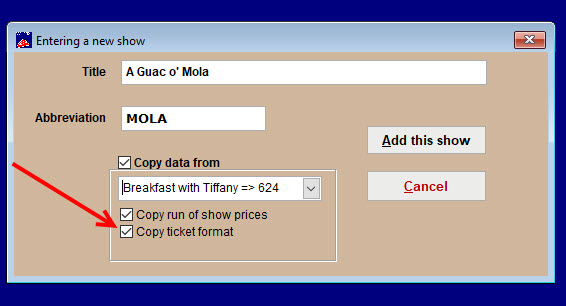
- Go to Show | Utilities | Add a new show.
- Enter the name and abbreviation of the new show.
- Check the box Copy data from.
- Choose the show from which you want to copy the data.
- Make sure the Copy ticket format box is checked.
- Add the show.
- When the Editing a show window comes up, make sure you check the box Special Ticket Format.
- Close the Editing a show window.
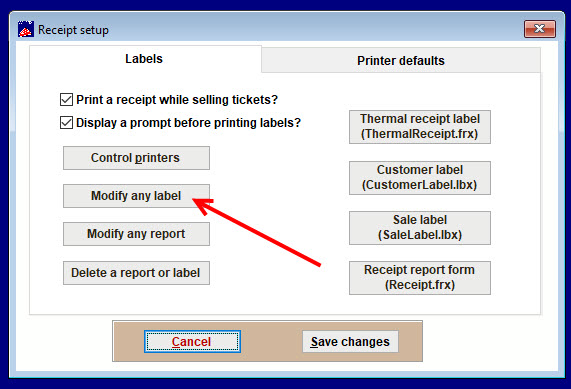
- In the main Wintix window, go to File | Label and receipt setup | Modify any label
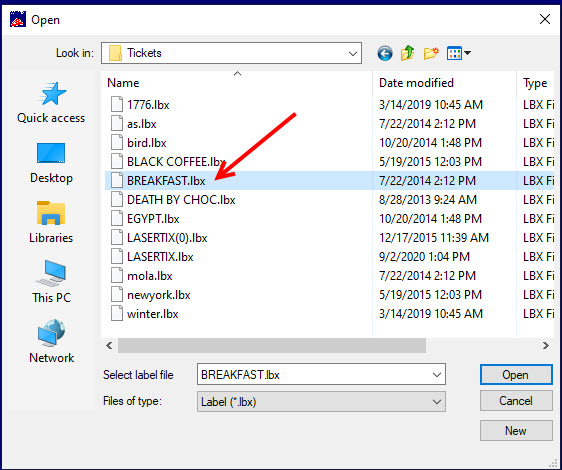
- Navigate to the C:\Wintix6\Tickets folder.
- Click on the ticket format you want to use for the new show (the ticket format from the last show in which the ticket format was used). The ticket format will be named whatever the abbreviation was for the last show in which the ticket was used.
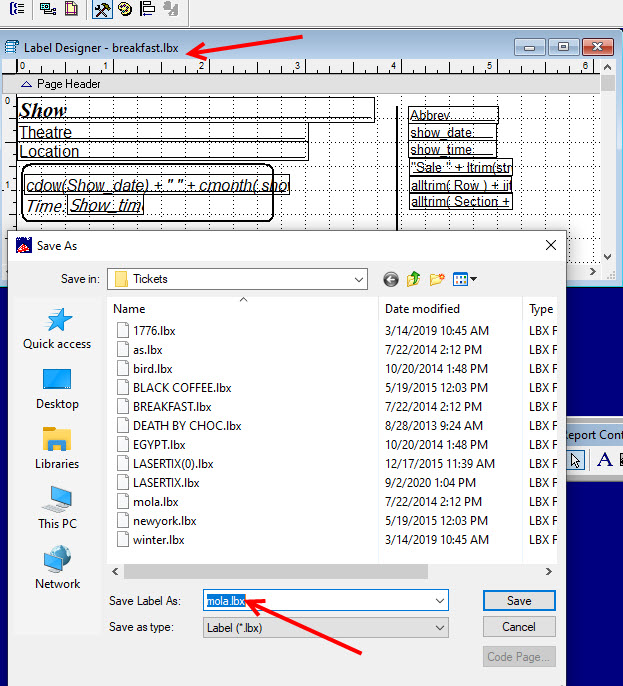
When the label designer comes up, choose | File | Save As | <Name the new ticket format as the abbreviation of the new show for which you are setting up the ticket>.
Example, if the abbreviation of your show is mola, then you would save the ticket format as mola.lbx
- Go to Show | Edit a show <name of show>.
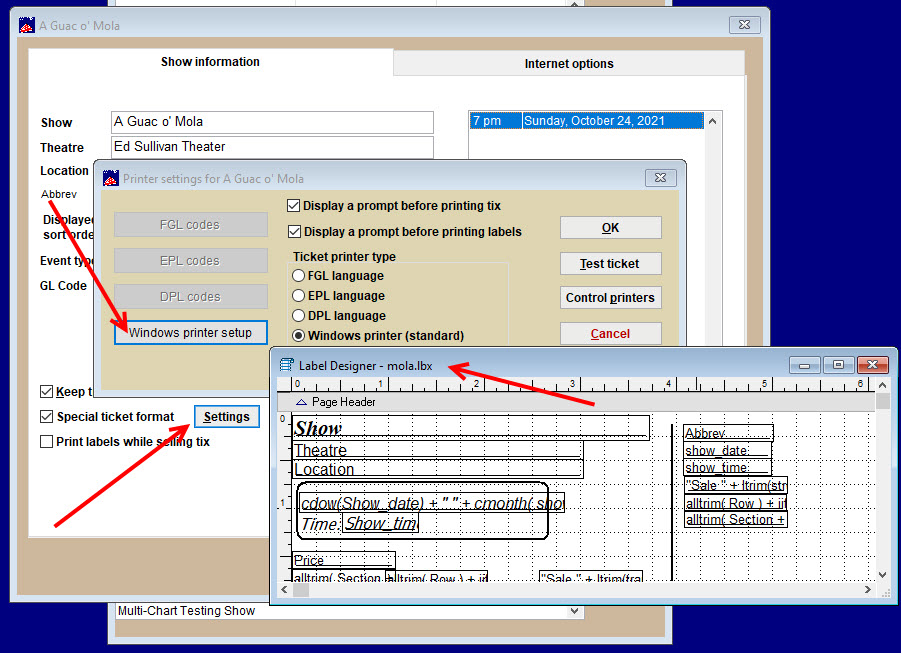
- Click on Special ticket format | Settings | Windows printer setup.
- That will bring up the ticket format you just created.
What happens when you are use a special ticket format and decide to change the ticket format?
If it is a simple change with a couple of fields, just re-type the fields.
If it is a complicated change, you might think to copy an entire format from an existing show to the new show. Before you do this, we suggest you contact support at Center Stage Software and we’ll give you a hand.
If you want to modify the master copy on the server, there are two ways to do it:
- Re-create the format where it is. Depending on how complicated the format is, this can take awhile.
- Erase the format. If you click on File | Label and receipt setup | Delete a report or label, you will see a list of files- see sample screen shot below.
- Select the one you want to delete. That file will be removed from the server as well as where it is stored locally. Then, you can copy one format where another one is.
- As you can see, this is rather complicated, so don’t be shy. Give our CSS support a call or email.

