
(Last updated on: October 9, 2018)
Have you ever wanted to print your GA seats for a general admission event a few hundred tickets at a time so you can consign these tickets to different organizations or departments within your organization? Do you want each ticket numbered? Here’s how:
First – create the seating plan:
- To create a seating plan in Wintix for general admission, click on Tools |Seating plans and click on the Create a new plan button.
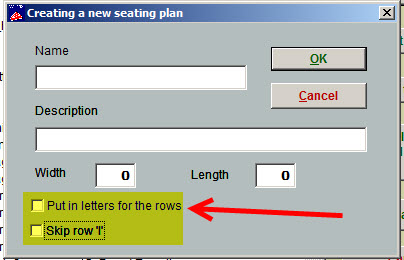
- You will be prompted to give the plan a name and a description, plus the width and length. For example, if you have 800 seats in your general admission facility, create a seating plan grid no more than 40 wide. That would mean your length would equal 20 rows long and 40 seats across. That will be displayed quite nicely in Wintix. If you need help with this, definitely call our support team.
- NOTE: Make sure the boxes Put in letters for the rows and Skip row “I” are unchecked. See screen shot below:
- After you have completed the screen above, click on the OK button and the next thing you’ll see is a message that so many records have been created. Click on OK and click on the button Modify this plan. Make sure your new plan is highlighted like this:
![]()
- Double click on the plan. The next thing you will see is your seating plan grid. See below:

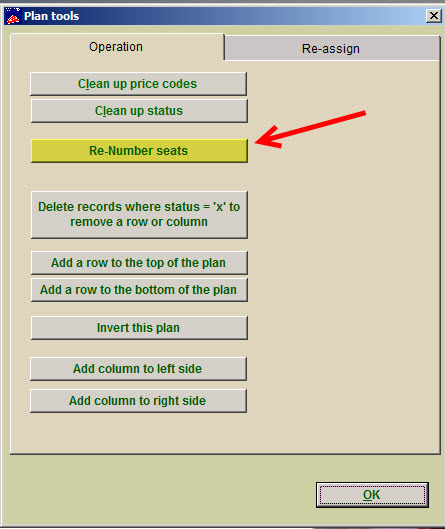
- Next, you will need to number all the dots. Where you place your cursor will depend on if you want to number from left to right or right to left. For this demonstration, we are numbering from left to right. We place our cursor at the top most left dot and then click on the Plan tools button that’s located at the bottom of your screen within the Edit the seating plan screen. When you click on the Plan tools button, you will see the window below. Click on the Re-Number seats button.
- After clicking on the Re-Number seats button, you will see the window below. For our purposes, we are starting with the number 1 and click the radio button Number to the right. We then click the OK button.
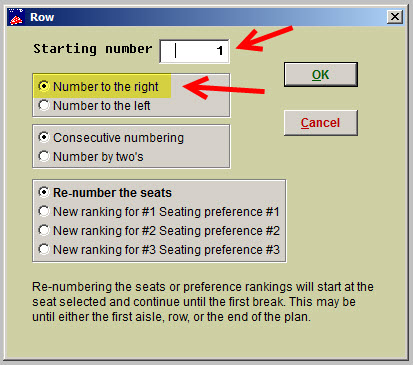
- At this point, Wintix will completely number the entire seating plan grid from 1 to 800.
- The final step is to make the entire seating plan available for sale by inputting the valid codes into the seating plan.
- Aim your cursor on the top most left hand corner of the seating plan and do a right click on that dot that is located at the very top most left hand corner. Then aim your cursor again to the lower right hand corner of the seating plan and do another right click. You should see a bunch of asterisks like the screen shot below, as well as the window prompt, Select the field to be changed and enter the new value.
- Click on the radio button labeled Valid price codes and the Valid price codes field below will be populated with all 48 price codes. If you only want to include selected price codes, you can change what is in the Valid field. Always include $, 0 and the period. Click on the Apply the changes button. Once Wintix completes the procedure, you can click on the OK button and you’re done!

Second – modify your ticket template so when tickets are printed, each ticket will print a ticket number:
Note: you will probably need help from our support team, so don’t be shy. Give us a call (831-920-1254) and we’ll give you a hand on this.
- In Wintix, click on File | Ticket setup | Windows printer setup and you will see your standard default ticket format.
- A word of caution here: If you use this standard ticket format for your regular reserved seats, it is recommended that you click on the File | Save As to create a new ticket format file name for just your general admission events for ticketing printing in advance.
- Double click on “alltrim( Section +)” and replace with the following – see second screen shot below:
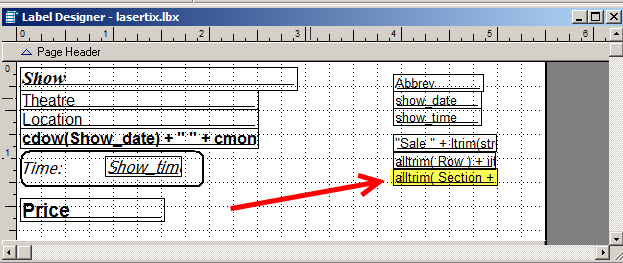
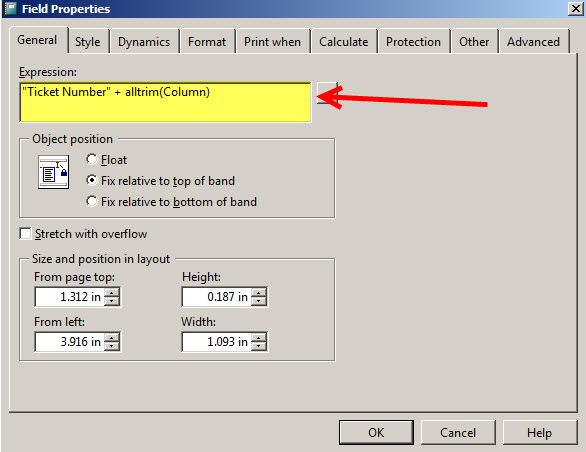
You may input the “Ticket Number” + alltrim(Column) variables on the lower right hand side of the main stub and the audit stub within the Label Designer-lasertix.lbx file.
Now click on File | Save to save the changes on your ticket format.