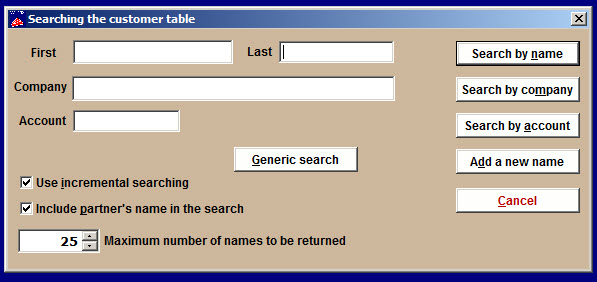
- Go to Mailing list | Customer lookup. It opens the Searching the customer table window.
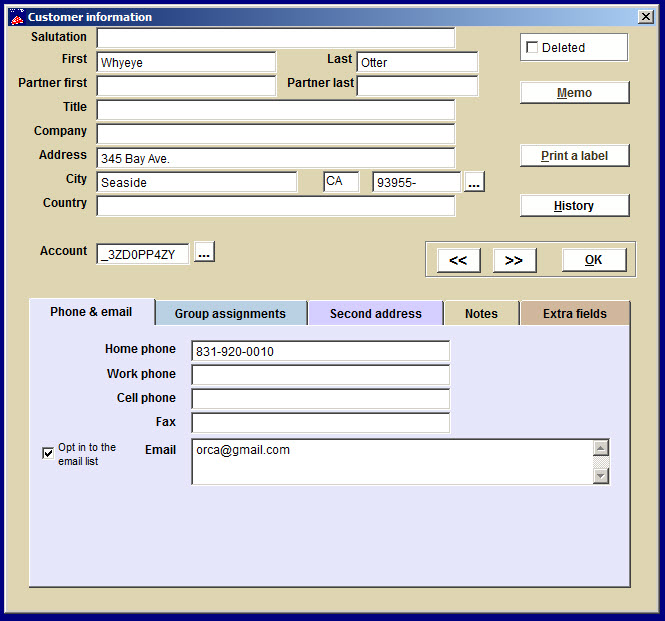
- Type in first and last name, then click Add a new name. The Customer information window appears.
- Type in the rest of the information you need, including address, phone and email (the default tab is the phone and email tab). If the person wishes to be on your email list, check the Opt in to the email list box.
- From this window, you can print a mailing label, look at the customer’s ticket history and add a memo about the person.
Consider using the other tabs in this window to add valuable information about your new customer.
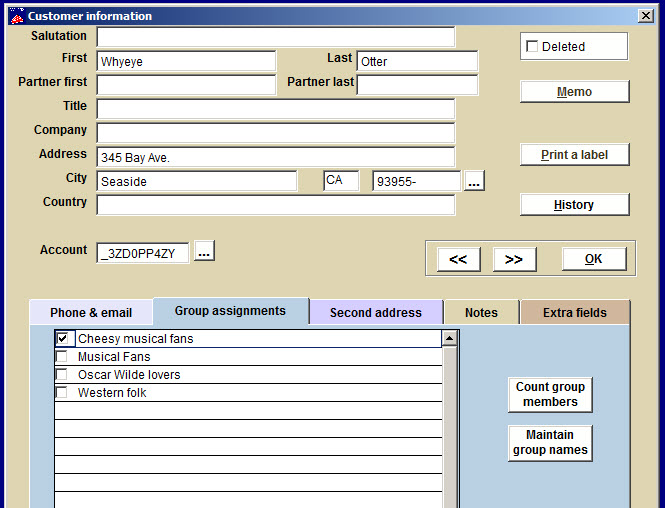
The Group assignments tab
- When you mark a check box, it assigns the customer to a Mailing List Group. These groups are invaluable as marketing tools, so click on the above link to learn how to set them up and use them.
- If you want to see how many people are in the groups, click Count group members.
- If you want to add or delete a group, or perform other functions to maintain your mailing groups, click Maintain group names.
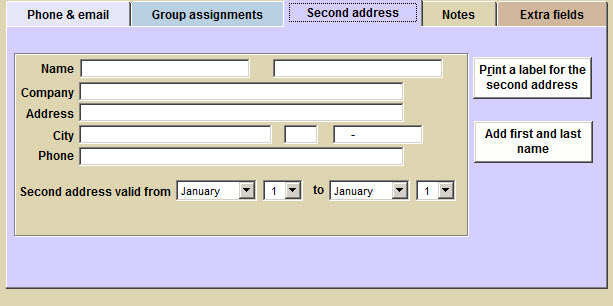
The Second address tab
- This is very useful in situations where patrons have two addresses that need to be in their record. Note the Second address valid from fields – this is particularly helpful in cases where your patrons are transitory, like “snowbirds” who move to southern states during the winter.
The Notes tab
- This is where you can add extra remarks or codes you may use with the customer. The check boxes at the bottom right, add a House Manager Alert to any sales you make to the customer.
- With House Manager Alerts, you can know if someone needs special assistance when they arrive at the theatre, that a special VIP is coming so you can personally greet them, or any other important details that deserve extra attention.
NOTE: If you are a Webtix user, your patrons may be able to retrieve their billing information by setting up a password, if you have set up Webtix to allow them. If your patron wants to change their password, they need to call you. The Change password button allows you to change it.
The Extra fields tab
- This is not something you need to concern yourself with.


