While you cannot change the size of a seating plan once it’s in use, you can add seats to “empty” spaces in the plan.
Here are the instructions for adding additional seats to your seating plan.
We’ve included a couple of screen shots below the instructions for additional reference.
- Keep in mind that this will add seats to all shows that are using this seating plan.
- First, in Wintix, click on Tools | Backup | Backup Data
- A black DOS window will appear.
- Do NOT close that window. Closing the window will stop the backup from completing.
- When the backup has finished, the black window will close itself and you’ll see a message telling you the backup finished successfully and where the backup file was saved.
- Now, go to Tools | Seating plans. Either a) <highlight the plan you want to work with> |Modify this plan, or b) double click on the plan you want to modify.
- A window will appear with your seating plan.
- Decide where on the plan you want to add the seats.
- If the seats are all in one row, you can right click on the far left seat, then right click on the far right seat.
- That will ‘select’ all seats at once.
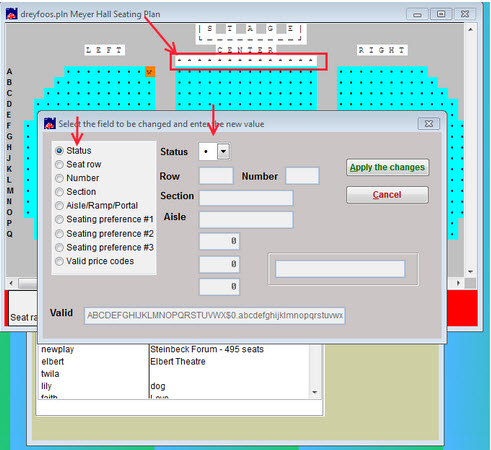
- A window will appear showing the name and description of the plan at the top.
- There is a list of fields on the left named Status, Seat Row, Number, etc.
- You will only be able to update one field at a time.
- The status can be the default ‘Character 249’ or whatever you want it to be, it just can’t be blank.
- So, choose the status from the drop down box, then click Apply the changes.
- Now, right click on the far left seat again and right click on the far right seat again, which will again select all seats in between your ‘clicks’.
- Now, this time, choose the field Row from the list on the left.
- That will make the field named Row active so you can type in the letters for the row.
- Click Apply the changes.
- Now right click on the far left again, right click on the far right again.
- This time, choose the field Number from the list on the left.
- That will make the field named Number active so you can type in a seat number.
- You will need to keep right clicking on the far left and right clicking on the far right, selecting all seats.
- Then using the fields from the list on the left, enter a Section and Aisle, if applicable.
- The Seating preferences #1, #2 and #3 can be ignored unless you have seat rankings on your plan and you know what numbers to enter in those fields.
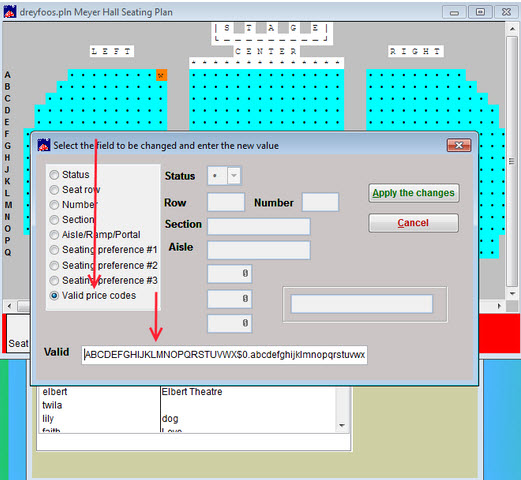
- The last and a very important field is the Valid price codes.
- Right click and right click, choose Valid price codes which will make that field active.
- Choose your price categories per your needs (you can leave them all there if you want, or pick and choose which ones you want there).
- Apply the changes.
- That should do it.
- Like we said, this will change the chart for all shows that are using this seating plan, so keep that in mind.