
(Last updated on: April 25, 2017)
Want to watch a video on how to sell a ticket? Go here.
- Go to Sales | Regular sale. The Selling a ticket window appears:
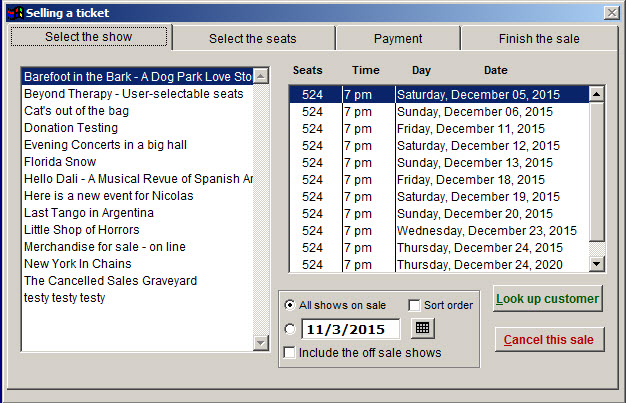 *Note the four tabs across the top of the window. These tabs indicate the steps used to complete a regular sale: Select the show, Select the seats, Payment, and Finish the sale.
The list box on the left indicates all shows that are available for sale.
- Click on each show. As you select a show, the individual performances for the show appear in the list box on the right. Click on a performance to select it for sale, then click the Select the seats tab to view the seating chart for that performance. If it is general admission, you will be able to select the number of tickets.
TIP: You can go directly to the seating chart of a performance by double-clicking on the performance. Select the show, (our example is “Motherless Brooklyn”) and double-click on the desired performance. The seating chart for this performance appears.
Selling Seats from a Chart
Our imaginary customer wants two seats near the front. So, you make the decision that they will want row B.
Tip: To get a larger view of the seating chart, click on the maximize window button on the title bar.
- Notice that the seat location, B-1, is displayed in the seat status box in the bottom left of the Seating chart window. A list of all valid price codes is also displayed.
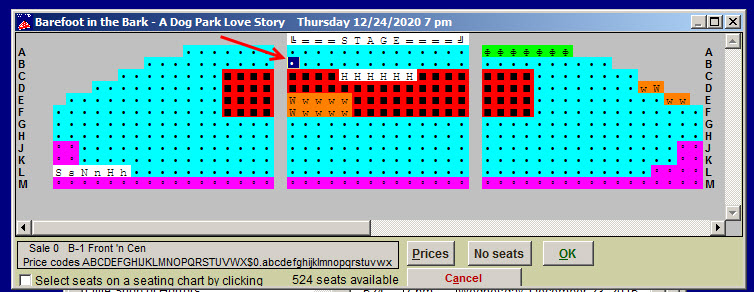
Our customer wants one Adult (A) and one Student (B) ticket.
Note: Click the Prices button to see a description of the available price codes for this performance. The Price detail window appears:
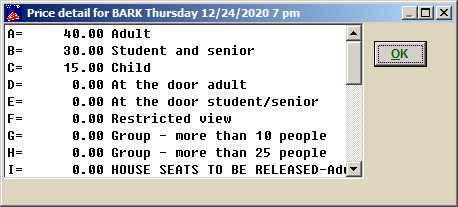
Click the OK button to return to the Seating chart window. When you return to the Seating chart window, reselect the seats you want to sell.
Since our customer wants an Adult ticket, we typed A = Adult, then clicked on the next seat and typed B for the Student seat, and pressed okay. Wintix takes you to the Payment tab.
Selecting a block of seats:
At some time, you might want to sell a block of seats (group sale) To do this, right click on one corner of the block then right click on the opposite corner. The program will select the seats in between. You will then select the price code to input.
Once you have selected all your seats and pressed OK. Wintix takes you to the payment tab.
Make Payment for a Sale
Use the drop down menu under pay type to select which form of payment your customer will use.
In this case, our customer will pay cash.
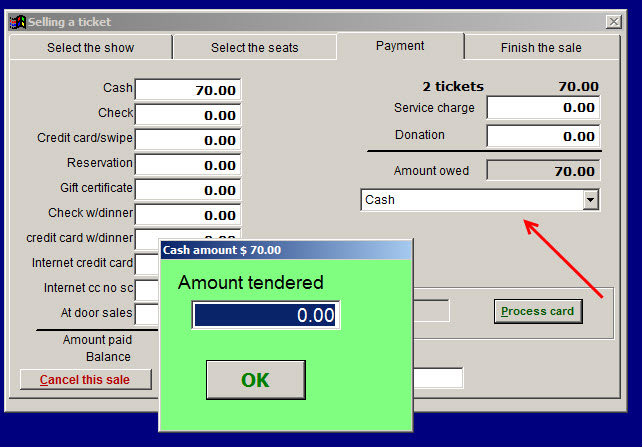
If they are paying by credit card, you can choose to manually enter the card number or swipe the card, depending on how you are set up.
- Click on the Finish the sale tab. A recap of the sale appears.
- If you haven’t already, enter your first name (or initials) in the Clerk field. You now have a chance to verify that all the sale information is correct. You can also choose a ticket delivery method, and whether to print a receipt or create a house manager alert.

Note: This would be a good time to read all the sale information back to your customer, because it all appears in this window!
Select a Customer
If you haven’t already, you need to enter the customer’s name and address for this sale.
- Click on the Look up customer button. The Searching the customer table window appears.
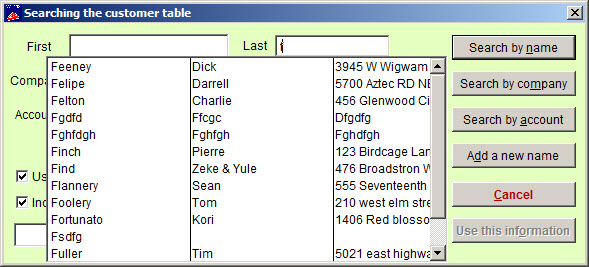
- If you have checked Use incremental searching in the Initializations | Mailing list tab, Wintix will begin to autofill as letters are matched. If you don’t have that checked, you must click the Search by name button.
- If it is a new customer, click on the Add a new name button. The Customer information window appears:
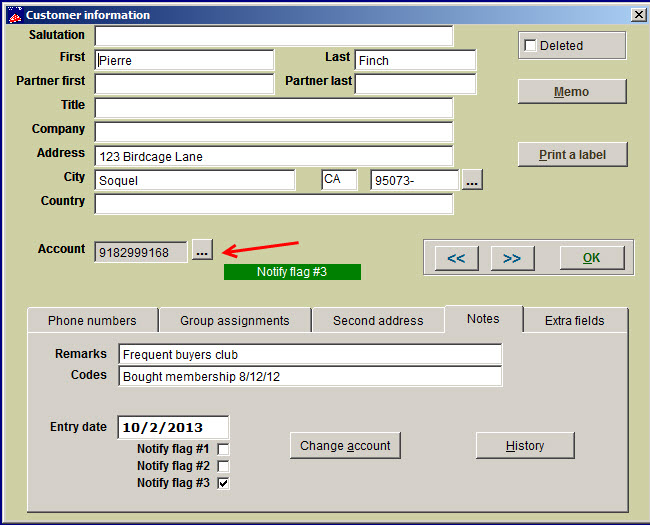
- Enter the customer information. Notice that Wintix has automatically assigned an account number.
- When you enter the street address and press enter on your keyboard, Wintix automatically advances to the zip code field. When you enter the 4- or 9-digit zip code, Wintix suggests a city from its zip code database. If the city that appears is not the one you want, type over it.
Note: You can explore the additional tabs at this time to add to the depth of information that can easily be gathered about an individual at the point of sale. You can assign that person to mailing groups at this point, as well.
You can browse through other customer records by clicking on the navigation buttons above the Notes tab.
- When your new customer information is entered correctly, click on the OK button to close the Customer information window.
- Wintix takes you back to the Searching the customer table window. Click Use this information.
- The Finish the sale tab in the Selling a ticket window appears:
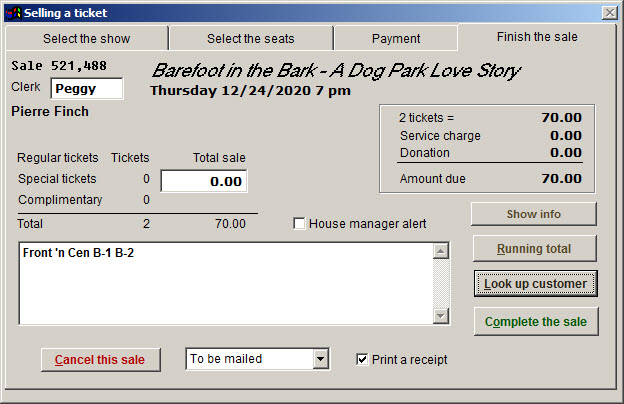
- Click on the Complete the sale button.
- The Ticket printing window appears:
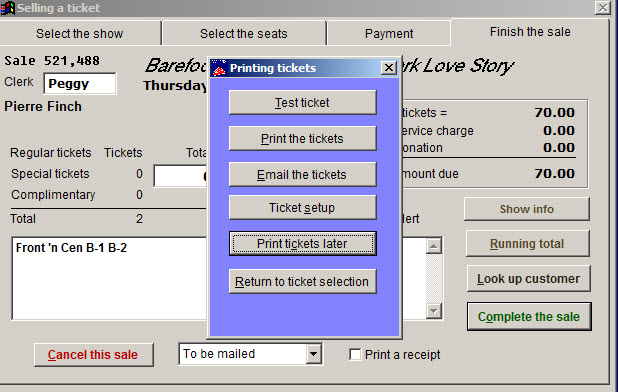
- Make your choice, then you will see the Completed sale window.
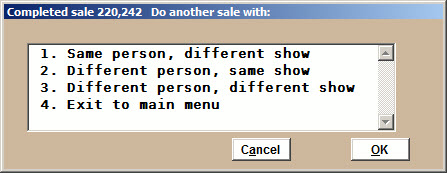
- To return to the main Wintix window, click on #4. To make an additional sale with the same customer, click on #1 to keep the current customer information, etc.
Congratulations! You have completed a Regular sale!