(Last updated on: October 2, 2015)
Have you entered names in Wintix from people who want to be on your mailing list but haven’t purchased anything yet? (For example, you want to mail a season brochure and include people on your mailing list who aren’t patrons yet with those who are.)
The way to do this is to run two separate DBF files: one for every customer name in your database, showing the ‘entry date’ of the record; and another one for every customer who has purchased tickets.
Then, using Wintix, you can do a file comparison of the two files. Wintix will take the list of every customer in your database, compare it to the list of customers who purchased tickets and then remove the names that have purchased tickets from the first file, leaving only customers who have no purchase history.
That file also has the ‘entry date’ that the record was entered, so you could then sort that spreadsheet by the entry date and have your list.
To run a DBF file of all customers in your database:
- In Wintix, go to Mailing list | Generate a mailing list | Create a new list.
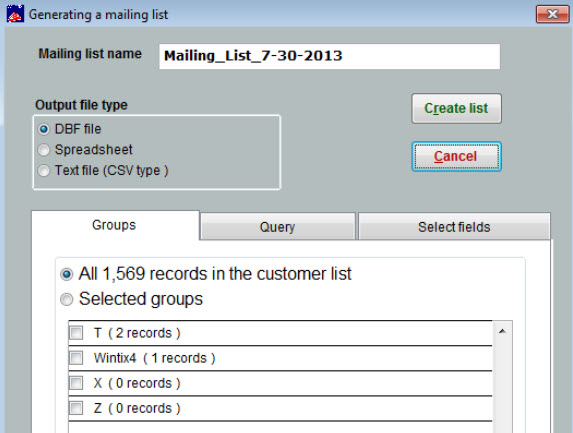
- That brings up the Generating a mailing list window.
- In the top line will be the file name (Wintix defaults to the name ‘Mailing_List_’today’s date’).
- You can change the name as you wish. by just deleting/typing over it.
- The Output file type should be DBF.
- On the Groups tab, All (number of customers in your db) customers in the list should be chosen.
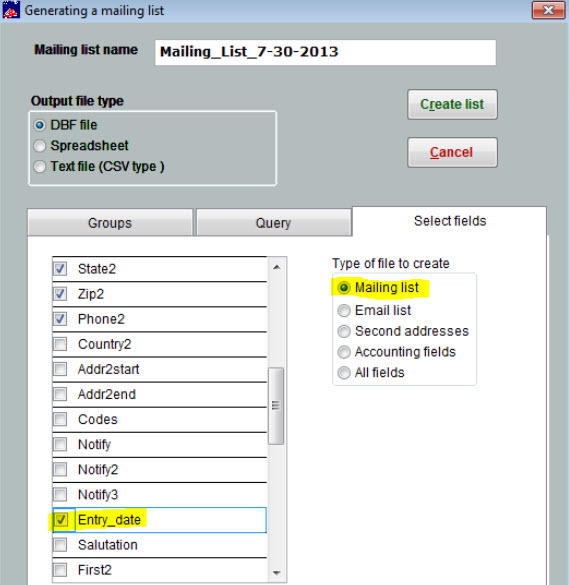
- Click on the Select fields tab.
- On the right side Type of file to create, choose Mailing list.
- On the left side, each field that has a check mark beside it, will be a column on your dbf/spreadsheet.
- Make sure you scroll down the field list and put a check mark beside the field Entry_date. Also, make sure Account and Customer ID are also checked.
- Click Create list.
- A window showing the DBF file will appear.
- Close that window.
- Close the Generate a mailing list window.
- Now go to Mailing list | Generate a mailing list|Export email.
- NOTE: This file is sent to your desktop by default.
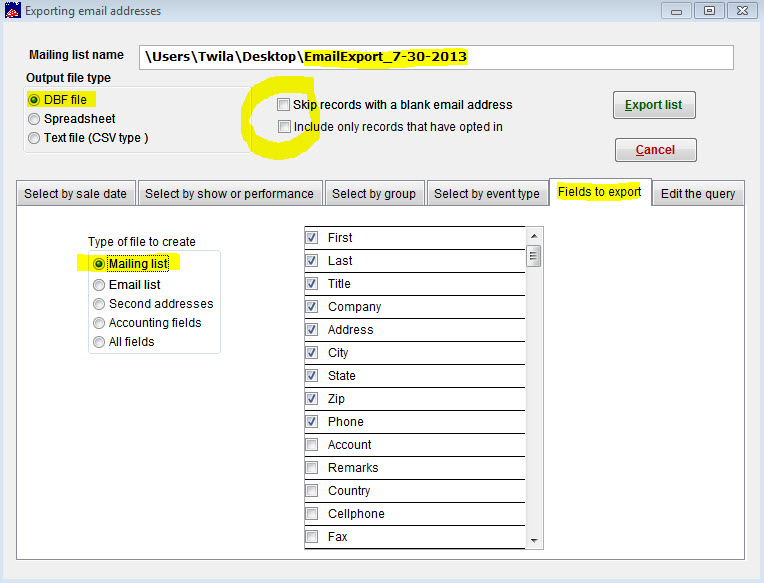
- Output file type should be DBF
- UNcheck both boxes Skip records with a blank email address AND Include only records that have opted in if you want a list of everyone, even if they have no email or haven’t opted in.
- Click on the Fields to export tab.
- Choose Mailing list as the type of file to create.
- Then, the last step is to click on the tab Edit the query. Clicking on that tab creates the query to send to the database.
- Now, click on Export list.
- You will see the DBF file window appear. Close that window.
- Close the Exporting email addresses window.
- Now, you’ve created your two lists and it’s time to compare them.
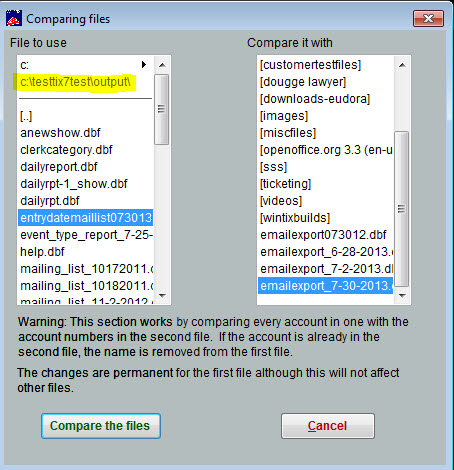
- Go to Mailing list|Utilities|Compare 2 files (subtraction).
- The Comparing files window appears, with two sides.
- On the left side, the File to use will be in the C:\Tix7\Output folder (whatever name you gave the file) – click on the file, so it’s highlighted.
- On the right side, the Compare it with file will be on your desktop – Email_Export_today’s date – click on the file, so it’s highlighted.
- Read carefully the wording on the bottom of that window. This comparison will change the first file (the one chosen in the left side) permanently after doing the comparison. It will only change the file you created, not your database.
- Now, click on the button labeled Compare the files.
- A message asks Is this what you want? and naming the files being compared.
- Click Yes.
- Now, the file that was first created, that was chosen as the File to use on the left side of the comparing the files screen, will have only names of customers in your db who have no purchase history.
- You can then go to Mailing list | Any local dbf file.
- A window will open to your Tix7\Output folder.
- Choose the file you compared.
- That will open the DBF file and you’ll see some Table tools in the upper left.
- Click on Table tools| View as a spreadsheet.
- Now you can sort the file by the entry date, save the file as a spreadsheet and you’re good to go.