(Last updated on: October 28, 2015)
Do you need to print the entire house? For example you may have a show at an off-site location.
- Go to Tools | Ticket printing | Print the house.
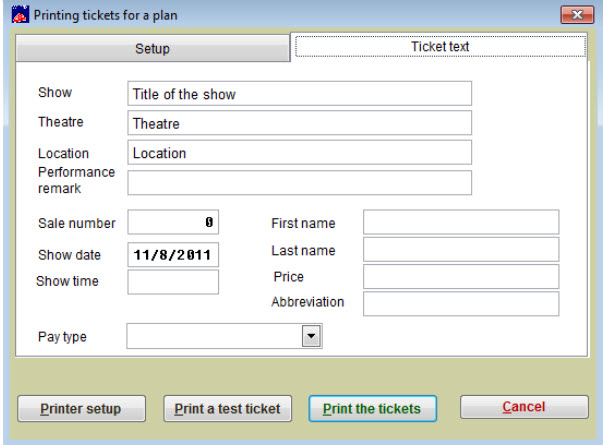
- A screen Printing tickets for a plan will come up.
- Choose the “House” you wish to print.
- Click on the Ticket text tab and enter your show information, etc.
- To have the tickets numbered sequentially, you can add the Field tixnum to your ticket format by clicking on File | Ticket setup | Windows printer setup.
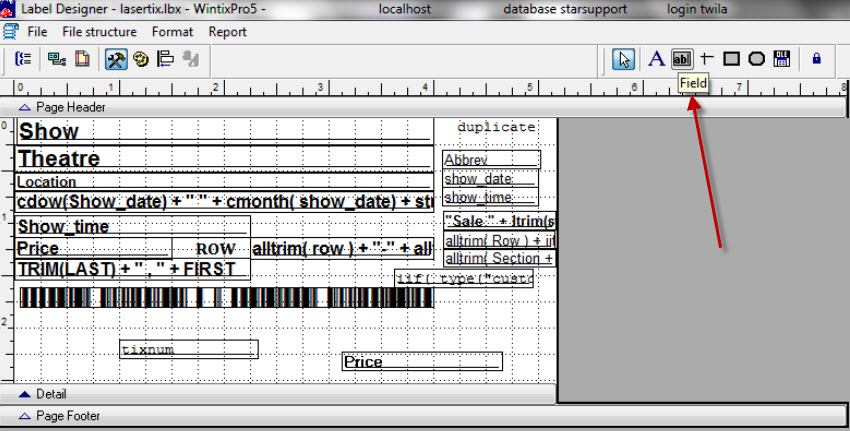
- That brings up the label designer with your default ticket format – Click on the ab| or Field tool.
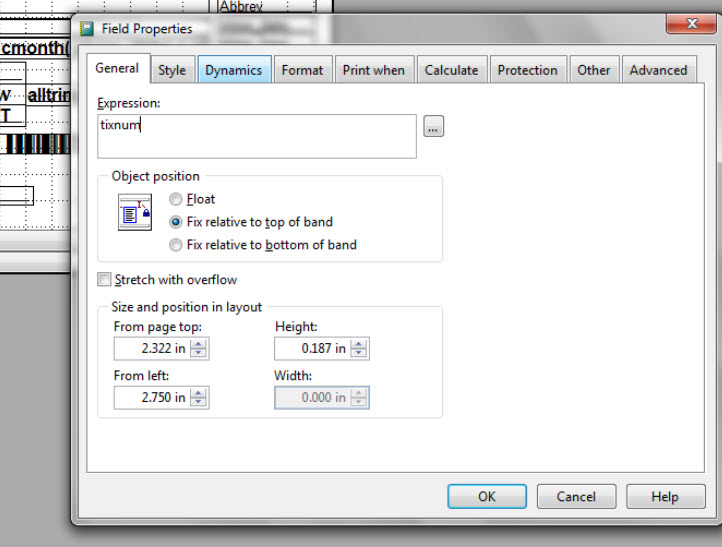
- Click on the ticket format where you want the ticket number to appear, a window named Field Properties will open.
- Type in tixnum.
- Click OK.
- You should now be back at the label designer.
- Click on File | Save – then File | Close.
- Click on Print a Test Ticket to make sure everything looks correct.
- When you’re satisfied that everything is printing correctly, click on Print tickets.
PLEASE NOTE:
The tixnum expression should be numbering the tickets from 1 to however many seats you have in your seating plan.
- Go to Tools | Ticket printing | Print the house.
- On the Setup tab, choose your seating plan.
- On the Ticket text tab, enter the information desired.
- Click on Printer setup (bottom left of screen).
- The Ticket printing setup window will appear.
- Click on Windows printer setup.
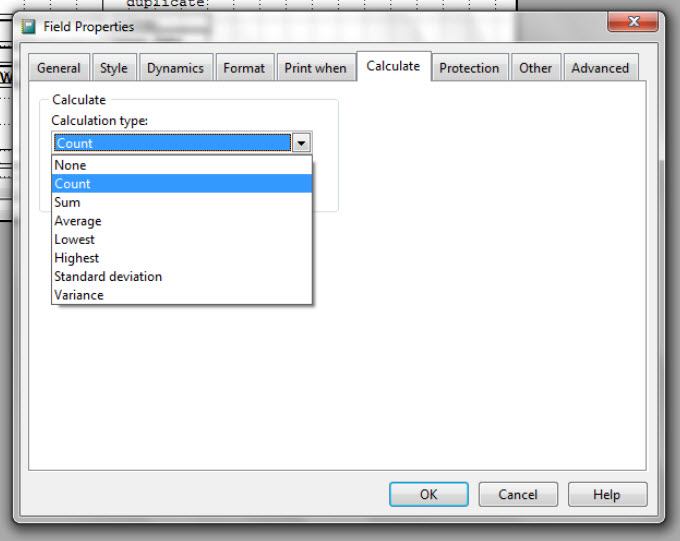
- The Label designer window will appear. Add the tixnum expression field to the ticket format, making sure the Calculation type (on the Calculate tab) is Count.
- Save the changes you made. Close the Label designer.


