
Click here to learn how to add and edit a pre-assigned season package in Wintix 6.
Click here to learn how to sell a flex season package in Wintix 6.
NOTE: One of the biggest features of season packages in Wintix 6 is that patrons can now choose their own seats online. You no longer have to incorporated form choices into Webtix for them to choose their seats or choose seats for them yourself, after they have purchased a season pass.
- Go to Sales | Season package sale and select the package.
- If you need flexibility, you can add or remove a show from this window.
- NOTE: if you accidentally remove a show, you can simply click on a different season package or cancel the sale. When you go back into your season package, the removed show will be there. Or just add back in by clicking Add a show.
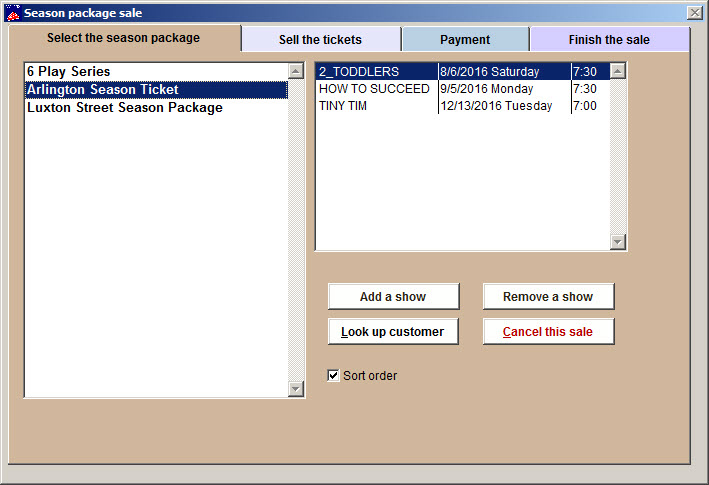
- Click on the Sell the tickets tab.
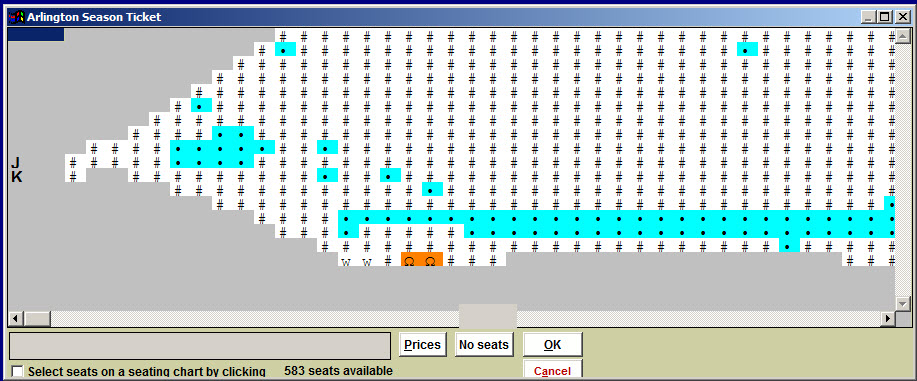
- Wintix looks at all the performances attached to a season ticket. If the seats are available for all the performances, they are listed as available on the season ticket. If a seat is not available for one of the performances, it is not available on the season ticket chart. If the performance does not use the same seating plan, that performance is not included. Any seat conflicts are dealt with the same way they are in version 5.
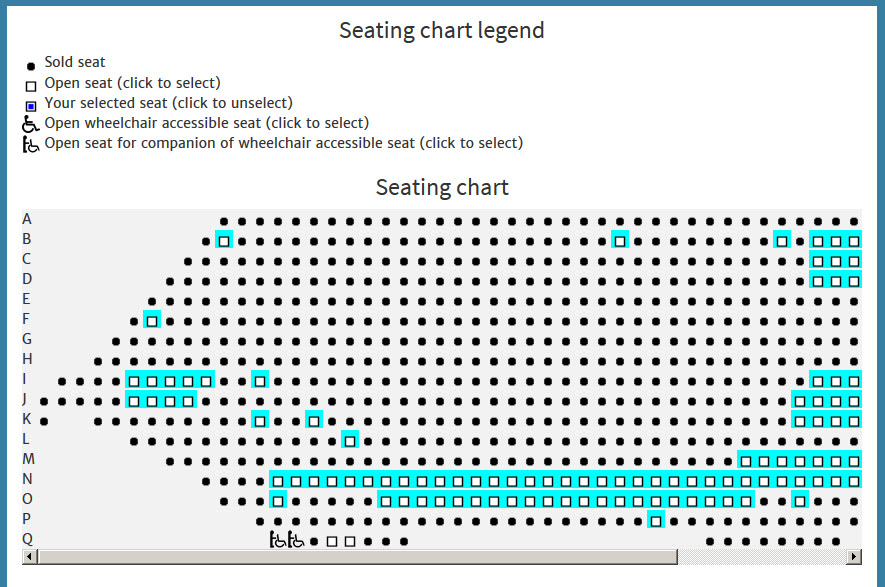
- This how it looks online in Webtix 6:
- In the example above, the seats that aren’t available for ALL the performances in the season package being sold are marked with a “#”.
- Choose the seats and price categories.
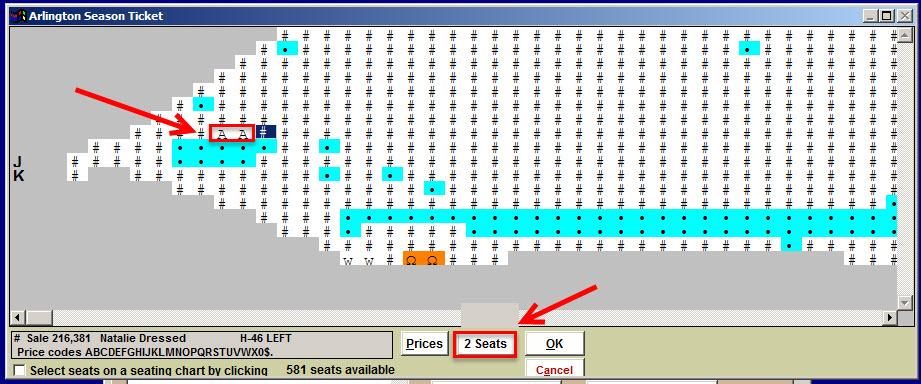
- Wintix then takes you to the Payment tab.
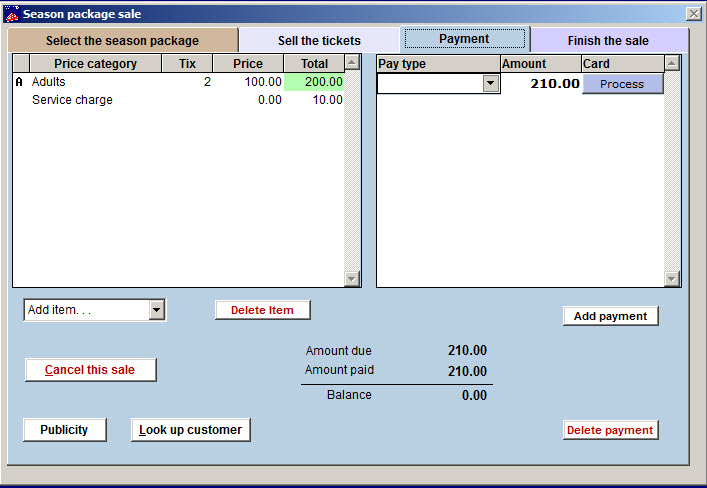
Make Payment for a Sale
- Use the drop down menu under pay type to select which form of payment your customer will use.
- In this case, our customer will pay with a Visa card. When you select a credit card, a Process button will appear. When you click on the button the Credit card data window appears.
- Depending on how you are set up, you can choose to manually enter the card number or swipe the card.
Split payment
- Wintix 6 allows your customer to split payments between different payment types very simply. If the total owed is $37, and the customer wants to pay $20 by cash and $17 by check, select Cash from the Pay type drop down menu, then type in $20.
- Click the Add payment button, select check, then type in $17.
Add items
- The payment screen also allows you to add other items, such as donations, service charges, or merchandise.
Finish the sale
- Click on the Finish the sale tab. A recap of the sale appears.
- Enter your first name (or initials) in the Clerk field. You now have a chance to verify that all the sale information is correct.
- Note: This would be a good time to read all the sale information back to your customer, because it all appears in this window!
Select a Customer
- You can now enter the customer’s name and address for this sale.
- Click on the Look up customer button. The Searching the customer table window appears.
- Enter either our customer’s last name, Montegue or first name, Romeo. The window should now look like this because he is a new customer.
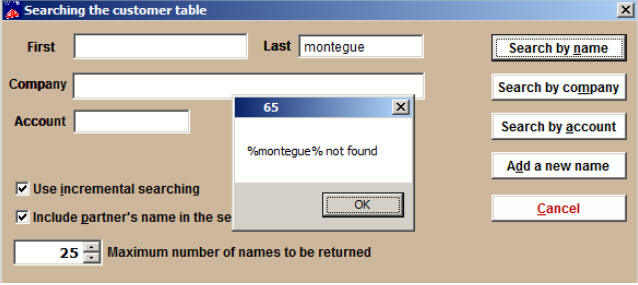
- If you have checked Use incremental searching in File | Initialization | Mailing list, Wintix will begin to autofill as letters are matched. If you don’t have that checked, you must click the Search by name button.
- Click OK and delete the name you have put into the field.
- Click on the Add a new name button. The Customer information window appears:
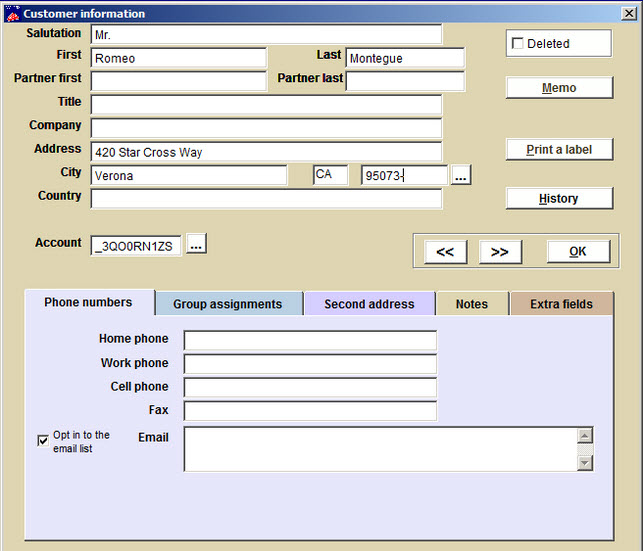
- Enter the customer information. Note that Wintix has automatically assigned an account number.
- When you enter the street address and press enter on your keyboard, Wintix automatically advances to the zip code field. When you enter the 4- or 9-digit zip code, Wintix suggests a city from its zip code database. If the city that appears is not the one you want, type over it.
You can browse through other customer records by clicking on the navigation buttons above the Notes tab.
- When your new customer information is entered correctly, click on the OK button to close the Customer information window.
- Wintix takes you back to the Searching the customer table window. Click Use this information.
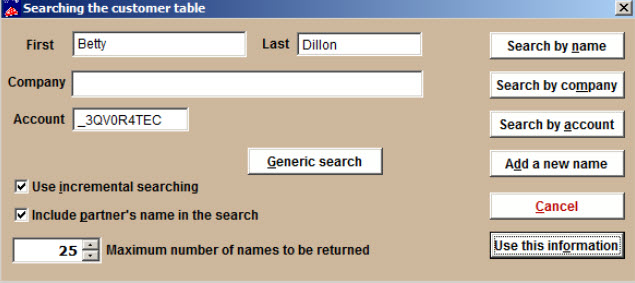
- The Finish the sale tab in the Selling a ticket window appears:

- Click on the Complete the sale button.