This post will guide you through adding a new show and has a link to a post about editing existing shows.
Before you set up a show, you must know:
- Whether the show will be sold as general admission or reserved seating
- The dates and times of all performances in the run
- All ticket prices and discounts for each performance
If your show is to be sold with reserved seating, you must first have a seating plan before entering the show and creating the performances. Read about seating plans.
Designing seating plans takes some time and a fair amount of working knowledge. Center Stage Software inputs your first seating plan and can add more seating plans for a nominal fee.
To add a new show
Go to Show | Utilities | Add a new show:
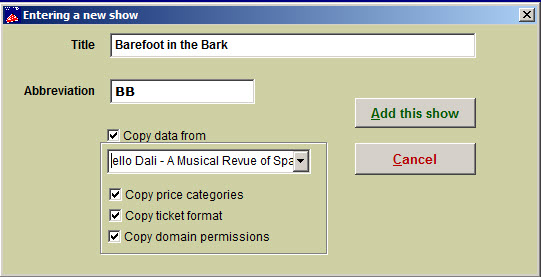
In the Title field, type the name of the show you are adding. For the best ticket printing and sale screen appearance, restrict this entry to 26 – 30 characters.
In the Abbreviation field, type a shortened name for the show. This entry will identify the show on reports. The field is restricted to 15 characters and will auto-format the characters entered as uppercase.
Copy data from (this is a short cut so you don’t have to re-enter the show prices and ticket formats for every performance dates), copy run of show prices, copy ticket format, and copy domain permissions allows you to skip the trouble of entering this information for each performance. Wintix will automatically upload this data if these are checked.
Click on the Add this show button. The Show information window appears.
Now you are ready to enter the show information and add all its individual performances.
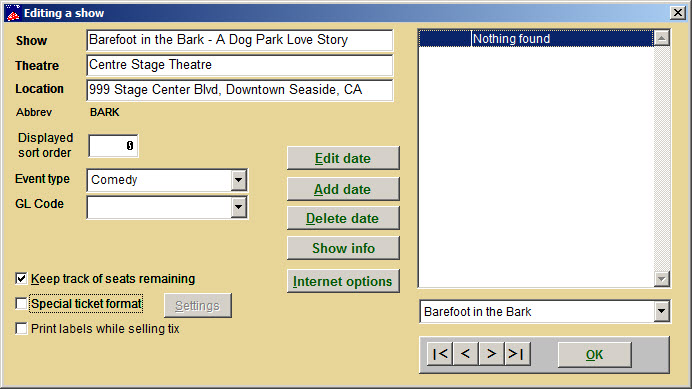
In the first three fields at the top left of the window, enter:
- The name/title of the show
- The venue or theatre name
- The location of the venue
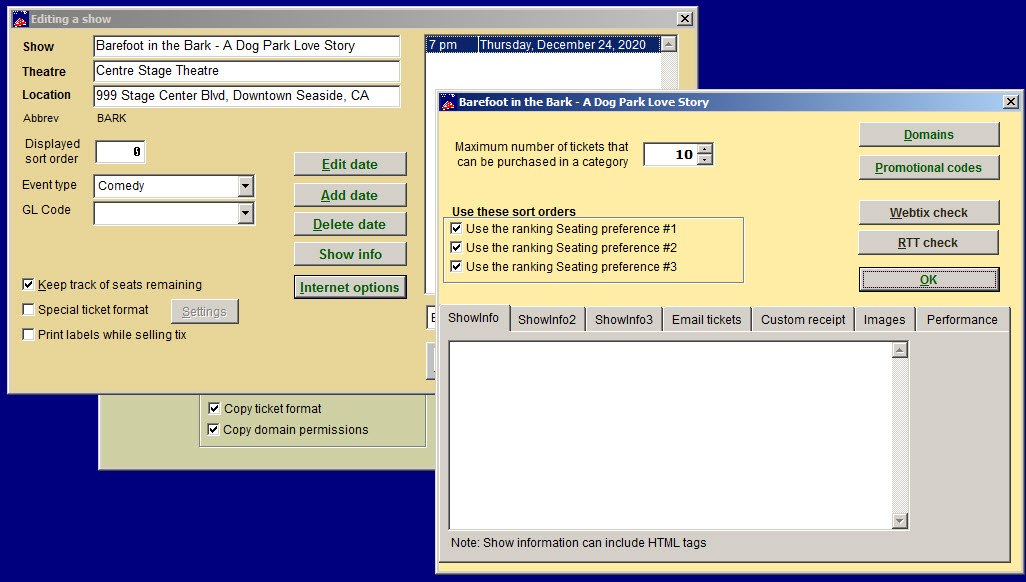
Variables in the Show information window:
- Displayed sort order – normally, Wintix will display shows alphabetically. You can rank shows if you wish them to display in a different order.
- Event type – choose an event type for reporting and marketing purposes. You can create reports to see who purchased tickets for a certain kind of event and let them know about upcoming similar events.
- GL codes: In the General Ledger Code field, type a key word to describe the department. Later, you can run reports by the general ledger entry. The purpose of this report is to group the shows and their money into a list for each department.
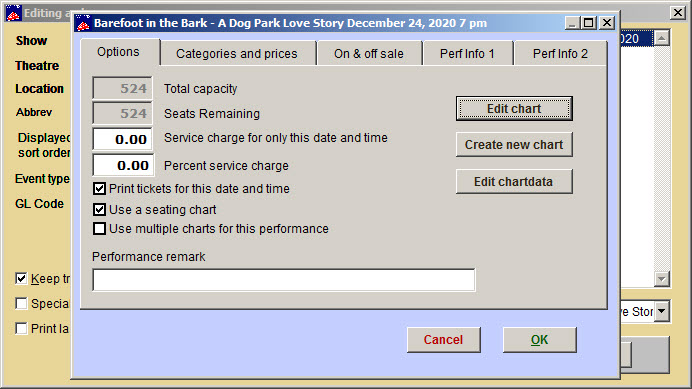
- Keep track of remaining seats keeps a running tally of the number of seats available for sale for each performance. This is handy when you are viewing a list of performances and want to know which dates have the best availability. If you ever need to update this figure, just run the seats remaining report.
- Special ticket format – most often you will use a default ticket format but this gives you added versatility.
- You can choose to print mailing labels while selling tickets.
- Edit date, add or delete date. (See above screen shot for adding a new date and time.)
Now enter the performances for the show. Click on the Add date button. The Adding a date and time to the list window appears:
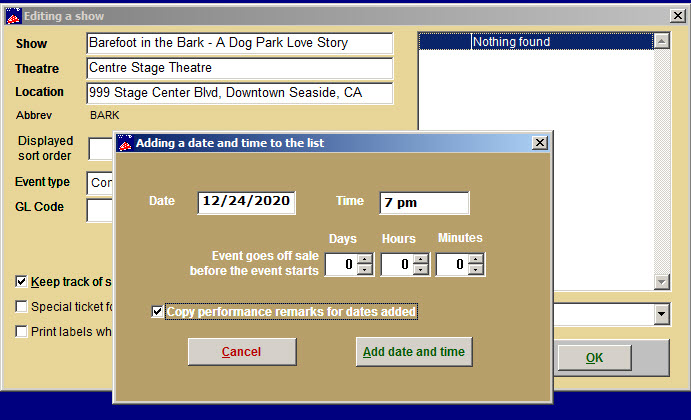
Enter the date as six digits: mmddyy. You do not need to type the slash marks.
Enter the time in any text format you like (8:00 PM; 8 PM, 8:00 pm, etc.). You may also choose to set when the event goes off sale and to copy performance remarks.
Your computer politely makes an offer you should not refuse:
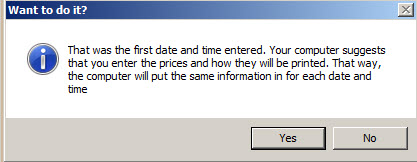
As suggested, it is a very good idea to enter all your prices and ticket price text at this time. Wintix will copy all the price and ticket text information to any performances added later.This saves a great deal of work and eliminates data entry errors.
Click on the Yes button. The Performance setup window appears:
The Performance setup window will be described in the posting reached by the link below.
Click here to learn how to edit a show.
IF YOU ARE USING WEBTIX TO SELL TICKETS ONLINE
- Click on the Internet options button.
- Click on the Domains button to allow Webtix to sell this show.
- In Domains, price codes and payment types, you need to enter the domain Internet, for Webtix sales, check the price “A- Adults” (which you just entered), and the payment type you are allowing Webtix to have.
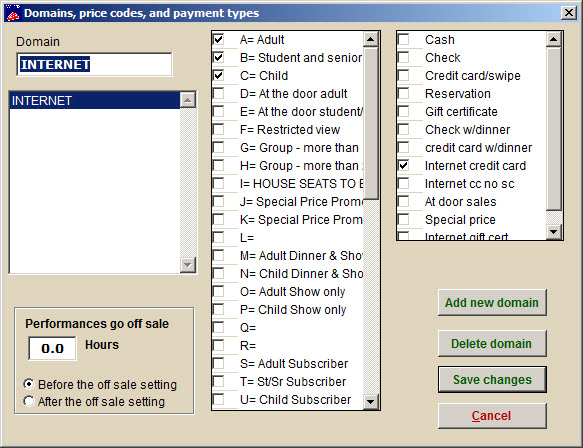
- Click on Save changes
- Check to make sure the show appears in Webtix.

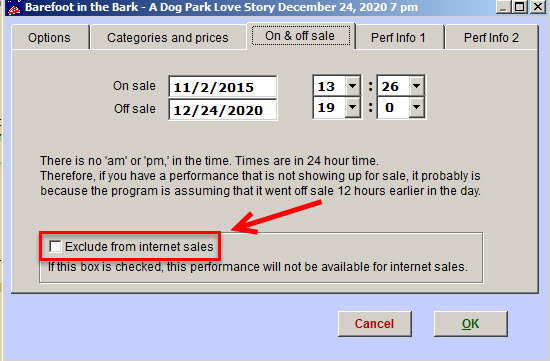
- If the event isn’t showing as on sales, edit the performance.
- Go to the On & off sale tab and make sure the Exclude from internet sales box is not checked.